Recipe for: Gummy Spider Skewers

Snacks halloween 45 min Easy 0 views ~1.60 PLN * - (0)
Rate:
(0)
Start Cooking

Description

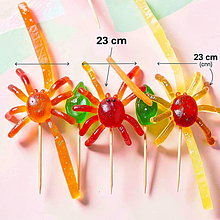
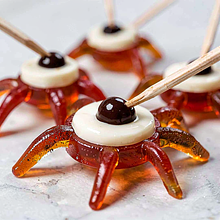
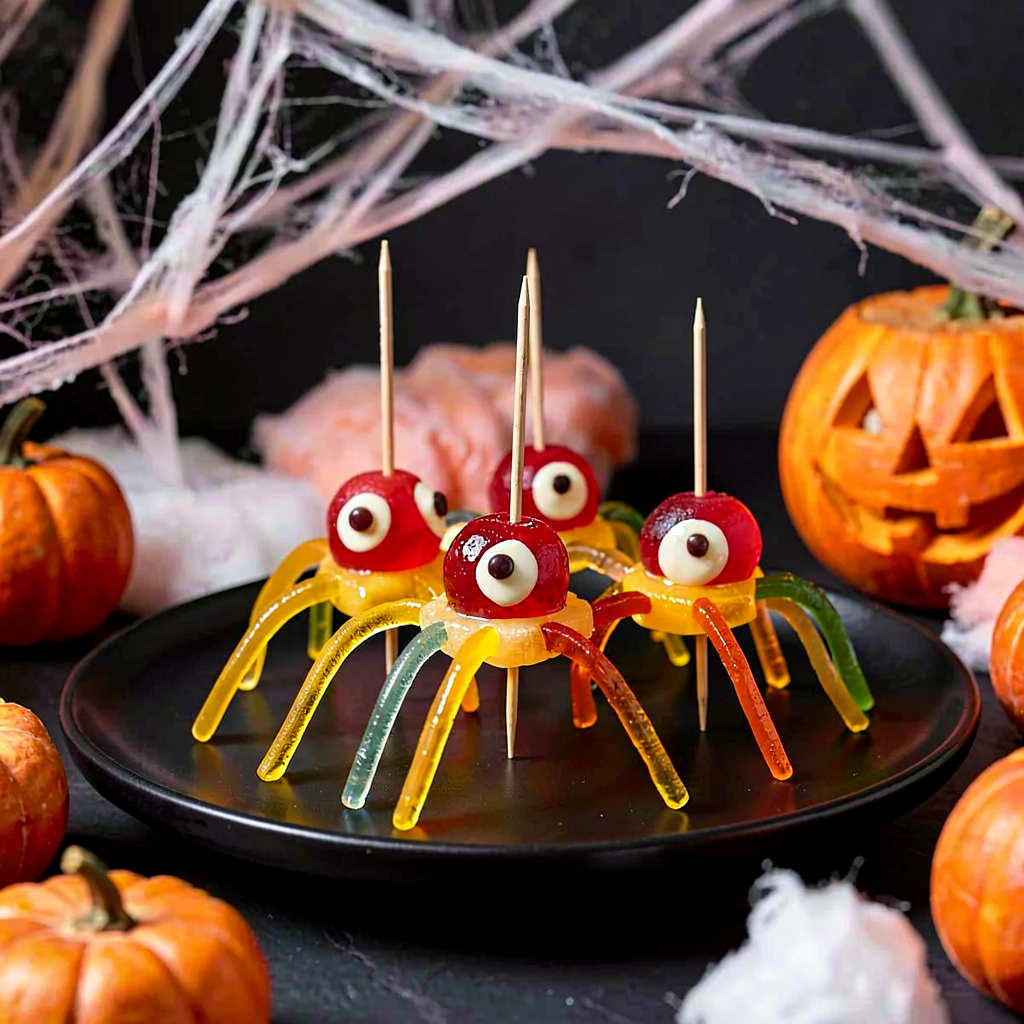
Colorful gummy spiders are a quick, impressive, and fun snack for a Halloween party — perfect for both kids and adults. They consist of gummies serving as the body and head, short strips of gummies as legs, and toothpicks holding everything together. The decoration involves painting eyes with white chocolate and a dot of dark chocolate as the pupil. The dish is easy to prepare, requires no baking or complicated baking skills; it’s worth serving on a dark platter with a "web" made of stretched cotton candy or alongside candles and autumn-themed decorations. The spiders are visually contrasting (bright colors of the gummies on a black background) and allow for plenty of creativity — you can use classic gummies, gummy worms for legs, or thin strips of jelly for a more "natural" effect.

Ingredients Used

Ingredients (4)

Servings:
20
  • Jelly 400 g
  • Toothpick 20 g
  • ✨ Optional
  • White chocolate 50 g
  • Dark chocolate 20 g
💰 Estimated dish cost: ~1.60 PLN (0.08 PLN/serving)
* Prices missing for some ingredients

💡 Click an ingredient to mark it as used

Preparation steps

Preparation

1

Count how many spiders you want to make (recipe for 20). Prepare the gummies: line a clean work surface with parchment paper. From the larger gummies, select 20 pieces for the bodies (preferably larger shapes like bottles or large circles). From the smaller gummies, choose 20 pieces for the heads. Cut short pieces from the thin gummy worms or strips for the legs — you will need 8 pieces for one spider. Each piece should be about 2–3 cm long (you can adjust according to the size of the body).

Ingredients: jelly
Use a sharp kitchen knife and a cutting board. When cutting the gummies, press the blade down and pull, instead of using a sawing motion — this will help achieve even pieces. If you don't have gummy worms, use thin strips of gummy cut lengthwise.
2

Prepare your workspace: a small bowl with cold water (for moistening the ends of toothpicks if needed), a plate or platter lined with baking paper, and small bowls for melting white and dark chocolate.

Ingredients: toothpick, white chocolate, Dark chocolate
The best is a flat, stable surface. Also prepare a paper towel and two small decoration bags (a zip bag or a piping bag).

Assembly

3

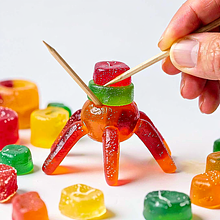
Shaping the body: take one toothpick. First, skewer a larger jelly (the body): insert the toothpick into its center at a slight angle, so that it pierces about half of the jelly — do not push it all the way through. Then, place a smaller jelly on the very tip of the toothpick (on top of the body) as the head, gently pressing until it settles.

Ingredients: jelly, toothpick
Use your hand to stabilize the gummy: hold the body with your thumb and index finger from the side, and insert the toothpick with your other hand. If the gummy slips, gently make a small incision with a knife where the head will go to help it hold better.
4

Adding legs: take the cut pieces of thin jelly (about 2–3 cm). On both sides of the body, just below where the head ends, skewer 4 pieces on each side — it’s best to place them in two groups (2 + 2) set at a slight angle, symmetrically. The legs should be slightly curved outward, and the ends can stick out freely.

Ingredients: jelly, toothpick
Insert the gummy pieces at an angle of about 45° towards the edge of the body. If the gummies tear, try making a tiny incision with a knife where you want to insert the leg first. Alternatively, stick the legs to the body with a bit of melted white chocolate as 'glue'.

Decoration

5

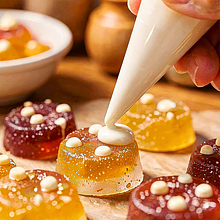
Prepare the eyes with white chocolate: break the white chocolate and melt it in a water bath (a heatproof bowl over a pot of gently boiling water). Stir with a wooden spoon until the mixture is smooth and lump-free (this will take 2–4 minutes). Pour the melted white chocolate into a small ziplock bag and cut off a very small corner (about 2–3 mm). Squeeze two white circles the size of a pea onto each head — these will be the whites of the eyes.

Ingredients: white chocolate
Maintain a low steam temperature — the bowl should not touch the water. If the chocolate thickens, remove the bowl, set it aside, and stir until it reaches a liquid consistency. Use a piping bag or a ziplock bag as a simple piping tool.
6

Make the pupils: melt a small piece of dark chocolate in a second small container (briefly, 20–30 seconds in the microwave with pauses or briefly in a water bath). Dip a toothpick or needle into the melted dark chocolate and place a dot in the center of each white eye. Leave the spiders on a flat surface to let the chocolate set for 10–15 minutes.

Ingredients: Dark chocolate, white chocolate
If you don't have dark chocolate, use a bit of cocoa dissolved in a minimal amount of water to make a thick paste. You can also use a toothpick as a 'brush' for applying the pupils.

Finishing

7

Arrange the finished spider treats on a platter lined with parchment paper. If you want an extra 'web' effect, tear a small amount of cotton candy and gently stretch it over the platter, placing the spider treats so they look like they are coming out of the web. Allow the chocolate to set completely (about 15 minutes).

Ingredients: jelly, white chocolate, Dark chocolate
Avoid storing the spiders in too humid an environment — the gummies can absorb moisture and lose their shape. For presentation, use a dark platter, black parchment paper, or pumpkin leaves for an autumn vibe.

Serving and presentation

8

Serve the spiders as individual snacks — each guest can grab a toothpick and eat a spider. Arrange the spiders vertically in a piece of Styrofoam covered with baking paper if you want them to be served standing. For drinks, serve them alongside mugs of hot chocolate or spiced tea, which will enhance the autumn atmosphere.

Ingredients: toothpick, jelly
If you are serving children, make sure the toothpicks have no sharp edges; you can gently break them into shorter pieces and smooth them out beforehand.

Fun Fact

💡

The first gummy candies appeared commercially in the 19th century; in the past, gelatinous sweets were made from animal gelatin, but today there are also vegan alternatives based on pectin and agar-agar.

Best for

Tips

🍽️ Serving

Serve the spiders on a dark platter for contrast; add a few dried apple slices and pieces of pumpkin for an autumn vibe. Place some of the spiders upright by inserting toothpicks into a small block of Styrofoam hidden under the decoration, so guests can easily grab the snack.

🥡 Storage

Store in a dry, cool place in an airtight container for 3–5 days. Do not refrigerate if the spiders have white chocolate — it may sweat and lose its shine. If the chocolate softens, set it aside for a few minutes in a cool room before serving.

📸 Cooked by the community

Log in to add a photo
Add a photo of the finished dish

After moderator approval, you will receive 10 experience points.

🍲

No one has added a photo yet. Be the first!

Comments (0)

Be the first to comment on this recipe!

Add a comment

You might also like

Recipe Categories

Snacks
Snacks in: Christmas Eve Dinner

Snacks are small pleasures between meals - savory, sweet, and always delicious. Vegetable chips, seasoned popcorn, and roasted nuts - healthy alternatives. Dips and spreads: hummus, guacamole, tzatziki, and baba ghanoush with vegetables. Skewers, canapés, and finger sandwiches for a party - elega...

See all recipes in this category

Halloween is a time when culinary traditions take on a dark and mysterious character. It's an opportunity for fun, creativity, and experimentation in the kitchen, where dishes take on unusual forms. In many countries, children dressed as ghosts and monsters run from door to door collecting candy,...

See all recipes in this category
Advertisement