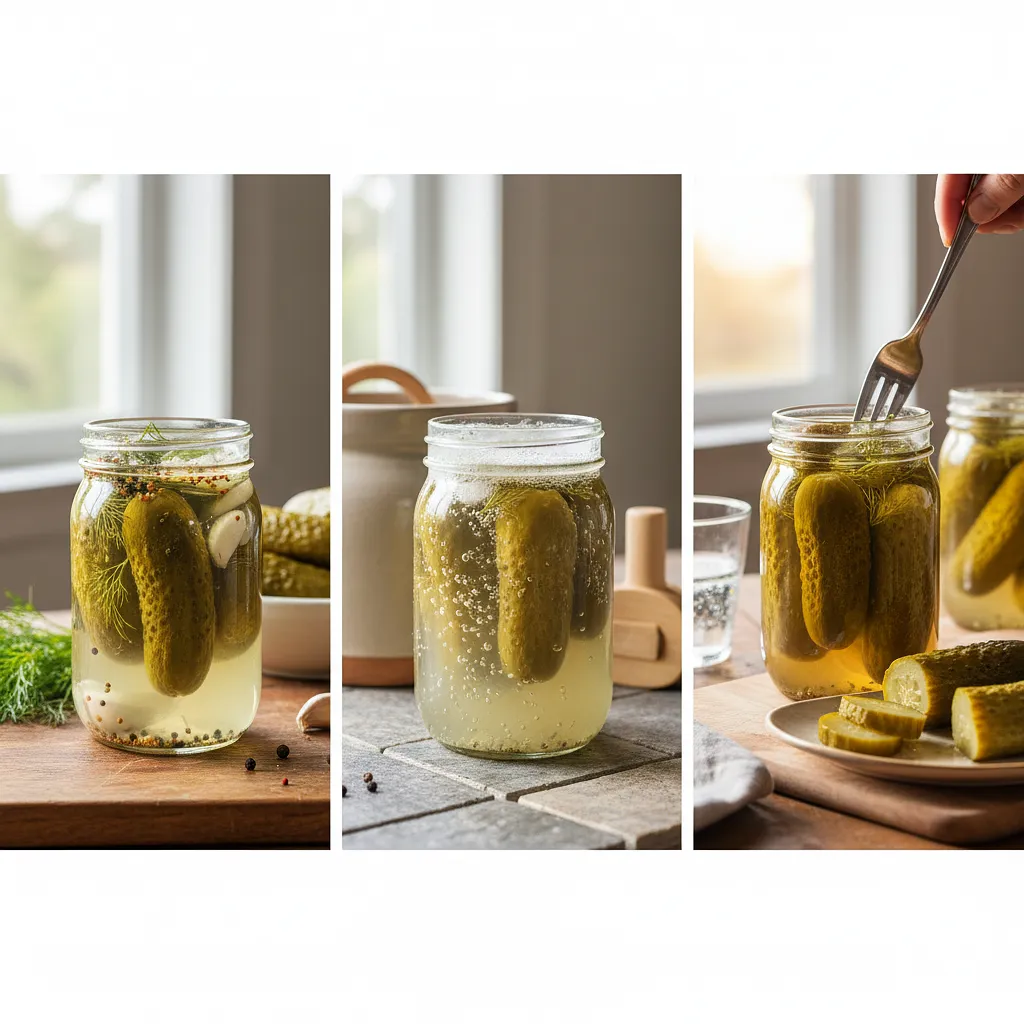
Start by thoroughly preparing the cucumbers. Place them in a large bowl or sink, cover with cold water, and let them sit for about an hour. Then, using a soft vegetable brush, gently scrub each cucumber to remove dirt and the natural waxy coating. Rinse thoroughly under running water. This step is crucial to remove any contaminants that could spoil the pickles.
Description
Lightly salted cucumbers are the essence of Polish summer, a crunchy and refreshing treat that serves as a bridge between fresh cucumbers and fully pickled ones. This recipe is not just an instruction on how to prepare them, but above all, a comprehensive guide to the art of home fermentation. Step by step, you will learn how to choose the perfect ingredients, prepare the ideal brine, and most importantly – how to select the right container for fermentation. We will uncover the secrets of traditional stoneware, the advantages of a transparent jar, and the character that a small oak barrel can impart. You will learn how to control the fermentation process to achieve cucumbers with the perfect level of sourness – slightly tangy, infused with the aroma of dill, garlic, and horseradish, while being incredibly crunchy. This dish, or rather the process, connects generations and is a wonderful introduction to the world of healthy, probiotic food.
Składniki (7)
- Ogórki gruntowe 2000 g
- Water 2000 ml
- Garlic 10 ząbków
- Horseradish root 1 szt.
- Dill with umbrellas 3 pęczki
- 🌿 Przyprawy
- Sól kamienna niejodowana 10 łyżeczek
- ✨ Opcjonalne
- Oak leaves 5 szt.
💡 Kliknij na składnik aby oznaczyć jako użyty
Preparation steps
Preparation of Ingredients
Prepare the aromatic additions. Peel the garlic cloves and cut each clove in half to release more aroma. Wash the horseradish root thoroughly, peel it with a vegetable peeler, and cut it into thick sticks about 5-7 cm long. Rinse the bunches of dill under cold water and gently dry them with a paper towel. If you are using oak leaves, rinse them as well.
Prepare the brine. In a large pot, bring 2 liters of water to a boil. Once the water starts boiling, remove it from the heat. Add 50 grams (about 2 heaping tablespoons) of non-iodized rock salt. Stir vigorously with a long spoon until all the salt crystals are completely dissolved. Set the brine aside to cool completely – pouring hot liquid over the cucumbers will make them soft, not crunchy.
Choosing and Preparing the Dish
Choose and prepare a fermentation vessel. You have three main options: a large glass jar (about 4-5 liters), a stoneware pot, or a small wooden barrel. Each vessel must be carefully prepared. Wash the jar in hot water with detergent, then sterilize it by pouring boiling water into it, closing it for a minute, and then pouring out the water. The stoneware and barrel should be thoroughly scrubbed and also rinsed with boiling water to eliminate unwanted microorganisms.
Arranging and Pouring
It's time to layer. Place some of the additions at the bottom of your chosen dish: a few sprigs of dill, a couple of sticks of horseradish, a few halves of garlic, and optionally, oak leaves. Then, start tightly and vertically arranging the cucumbers. Try to leave as little empty space as possible between them. While arranging, add the remaining garlic and horseradish. Finally, place the remaining dill on top, creating a 'blanket' for the cucumbers.
Once all the ingredients are arranged, slowly pour the prepared and completely cooled brine over them. Pour the liquid slowly to reach all the nooks and crannies. The brine must completely cover the cucumbers and the top layer of dill. The liquid level should reach about 2-3 cm above the solid ingredients.
Fermentation Process
Now you need to press down the contents of the container so that nothing spills out. You can use a small, sterilized plate that fits the opening of the container and weigh it down with a washed stone. There are also special weights for fermentation available in stores. Cover the container with a clean cotton cloth or cheesecloth and secure it with a rubber band. Do not seal the jar tightly – fermentation produces gas that needs to escape.
Set the container in a warm, but not sunny place (ideal temperature is 20-22°C) for 2 to 4 days. After the first day, you will notice that the water becomes cloudy – this is a sign that the lactic acid bacteria have started working. Bubbles of gas may also appear. Check daily to ensure the cucumbers are fully submerged. A white film (fermentation scum) may form on the surface – it is harmless and can be gently removed with a clean spoon.
After two days, start tasting the pickles. Take one out with a clean fork and try it. The lightly salted cucumber should be crunchy, slightly fizzy, and pleasantly sour, but still with a fresh note. If you prefer them more fermented, leave them for another day or two, tasting daily until they reach your ideal flavor.
Storage
When the cucumbers reach the desired flavor, you need to stop further fermentation. To do this, move the container (or transfer the cucumbers along with the brine to smaller jars) to the refrigerator. The low temperature will significantly slow down the activity of the bacteria. In the refrigerator, the lightly salted cucumbers will retain their crunchiness and flavor for about 2-3 weeks.
Fun Fact
Fermentation is one of the oldest methods of food preservation, known since ancient Rome. In Poland, the tradition of fermenting cucumbers, cabbage, or beets dates back to the Middle Ages and was a key way to survive long winters, providing vitamins when fresh vegetables were scarce.
Best for
Tips
Serve lightly salted cucumbers chilled, straight from the fridge. They are an excellent addition to sandwiches with cold cuts or pâté, and pair wonderfully with meat dishes, especially grilled ones. They can also be sliced and added to salads or served as part of a snack board (known as 'zakąski').
Always store cucumbers in the refrigerator, fully submerged in brine. It's best to keep them in a tightly sealed jar. They will stay fresh and crunchy for up to 3 weeks. Remember to always take them out of the jar with a clean fork to avoid introducing contaminants into the brine.
📸 Ugotowane przez społeczność
Zaloguj się, aby dodać zdjęcieDodaj zdjęcie gotowej potrawy
Po zatwierdzeniu przez moderatora otrzymasz 10 punktów doświadczenia.
Nikt jeszcze nie dodał zdjęcia. Bądź pierwszy!
Comments (0)
Be the first to comment on this recipe!
Add a comment