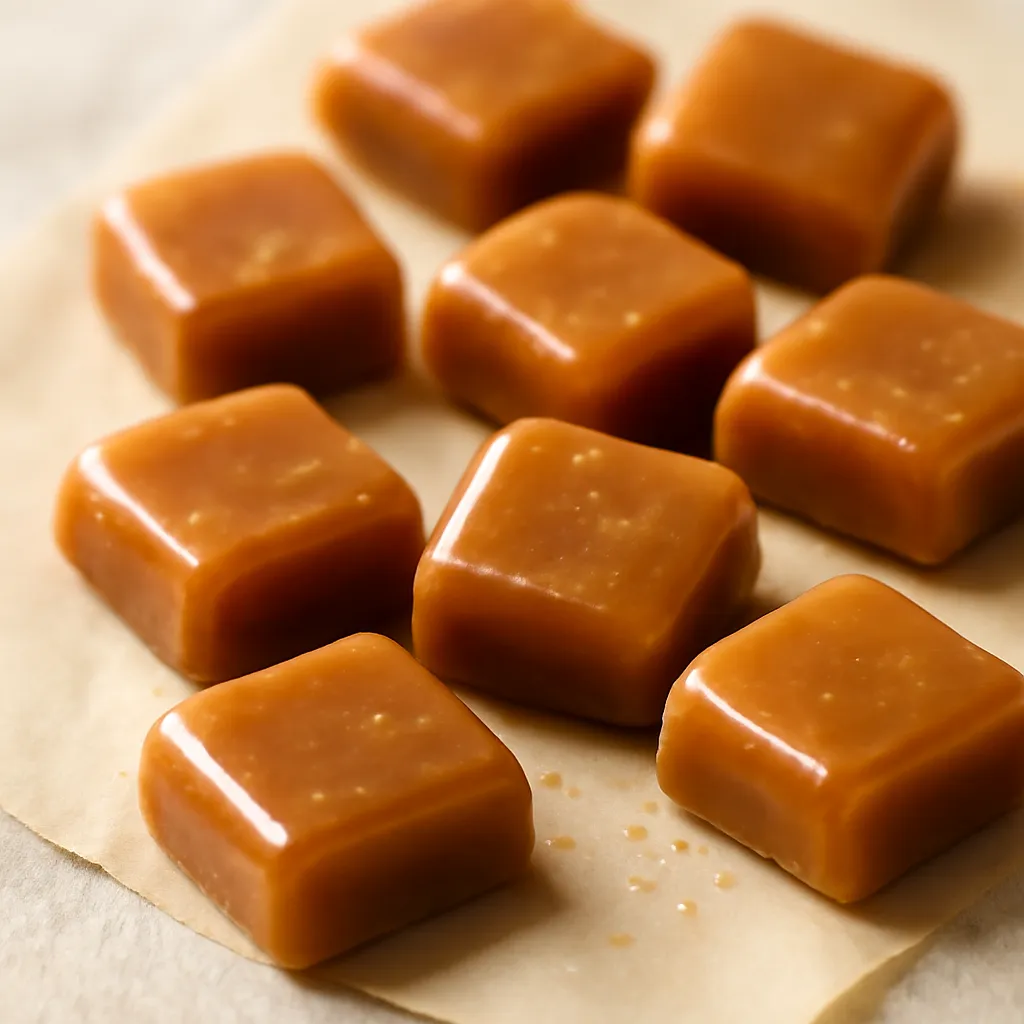
Prepare all the dishes and tools: measure and place next to each other the sugar, syrup, cream, butter, and salt. Line a 20x30 cm baking tray (or a pan of similar size) with parchment paper and lightly grease the paper with butter so the toffee doesn't stick. Set the digital candy thermometer or classic candy thermometer ready for use.
Description
Toffee candies are classic, chewy sweet-and-salty caramels with a golden-amber color and a velvety texture. Made from sugar, glucose syrup, heavy cream, and butter, they have a rich, buttery-caramel flavor that contrasts beautifully with a delicate sprinkle of sea salt or crunchy nuts. Toffee comes from the confectionery traditions of Europe and America — they are a popular feature of sweet buffets, homemade gifts, and New Year's Eve parties, as they can be individually wrapped and displayed beautifully on a table. They look great as hand-wrapped candies in transparent foil: shiny, with an even color, sometimes with small pieces of nuts. They are perfect to serve with coffee, dessert liqueurs, or as a sweet touch in gift boxes.
Składniki (9)
- White sugar 600 g
- Glucose syrup 200 g
- Cream 30-36% 300 ml
- Butter 120 g
- Vanilla extract 5 g
- Water 60 ml
- 🌿 Przyprawy
- Table salt 6 g
- ✨ Opcjonalne
- Coarse sea salt (for sprinkling) 3 g
- Chopped walnuts (optional) 100 g
💡 Kliknij na składnik aby oznaczyć jako użyty
Preparation steps
Preparing the toffee
Measure and weigh the ingredients: 600 g of sugar, 200 g of glucose syrup, 300 ml of cream, 120 g of butter, 6 g of salt, 5 g of vanilla extract, 60 ml of water. If using nuts, toast them in a dry pan for 2-3 minutes until fragrant and lightly browned, then chop and set aside.
In a heavy pot, combine sugar and water. Over medium heat, warm the mixture, stirring only for the first 1-2 minutes with a wooden spoon to evenly moisten the sugar. Once the sugar has dissolved (the mixture becomes clear), stop stirring - from this point on, gently swirl the pot to dissolve any potential crystals, but do not stir vigorously.
When the sugar mass reaches a light golden color and the sugar has completely dissolved (this usually takes 6-10 minutes from boiling), pour in the glucose syrup. Gently increase the heat to medium and allow the mixture to boil. At this point, prepare the candy thermometer — attach it to the side of the pot so that its sensor is submerged in the liquid but does not touch the bottom of the pot.
Cooking toffee
Bring the mixture to a boil and cook without stirring (you can gently swirl the pot) until the temperature on the thermometer reaches 124°C (you can aim for the range of 120–125°C depending on your preferred hardness: 118–120°C for soft toffee, 122–125°C for harder). The entire process from the moment it boils takes about 10–20 minutes.
Finishing the mixture
When the temperature reaches the desired 124°C, immediately remove the pot from the heat. Slowly and carefully pour in the warmed cream (heat it beforehand to slightly warm, 35–40°C, to avoid vigorous bubbling). Pour in a thin stream while continuously stirring with a silicone spatula. The mixture will splatter intensely and increase in volume — do this carefully.
After adding the cream, add the cold butter cut into pieces and the salt. Stir vigorously until the butter is completely melted and the mixture is smooth, thick, and shiny — this takes 1–2 minutes. Finally, add the vanilla extract and mix quickly.
Shaping and Cooling
Quickly pour the hot mixture into the prepared pan lined with baking paper. Use a silicone spatula to spread the mixture evenly. If you are using nuts, sprinkle them evenly over the surface right after pouring. If you want sea salt, sprinkle the coarser crystals right after pouring (the mixture should still be liquid for the salt to settle slightly).
Cooling
Set the mold in a cool, but not icy place (room temperature about 18–22°C) and leave it to set for 2 hours, until the mixture is completely firm. If you want to speed up the process, you can place the mold in the refrigerator for 30 minutes after 90 minutes — but do not leave it longer than an hour, as the toffee may become too hard.
Slicing and Packaging
Once fully set, remove the toffee block from the mold along with the paper and turn it onto a board. Remove the paper and, using a sharp knife dipped in hot water (dried with a towel), cut into rectangles or squares measuring about 2.5 x 2.5 cm (this yields about 60 pieces). If the mixture crumbles slightly while cutting, heat the knife in hot water and cut quickly.
Packing and storage
Wrap each piece individually in parchment paper or candy foil, twisting the ends like a candy. Place the wrapped candies in an airtight container, layering them with parchment paper to prevent sticking.
Final tips
Before serving, allow the candies to reach room temperature (if they were stored in the cold). Serve on a tray in small paper cups or arrange in decorative bowls on the dessert table. If you are preparing a New Year's sweet buffet, optionally label the version with nuts so that guests with allergies can easily avoid them.
Fun Fact
The word 'toffee' appeared in the English vocabulary in the 19th century and likely comes from regional expressions describing sticky, sweet treats. In 19th-century England, toffee became a popular homemade confection sold at fairs.
Best for
Tips
Serve the toffee in small paper cups or individually wrapped in parchment. Arrange on a tray along with small cards informing about the ingredients (e.g., nuts). Excellent alongside espresso, milk coffee, or dessert liqueurs (e.g., Baileys).
Store in an airtight container at room temperature (15–20°C) for up to 2 weeks. Separate layers with parchment paper to prevent the candies from sticking together. In the fridge, the toffee hardens and becomes less chewy - before serving, let it sit for 20–30 minutes at room temperature to regain its elasticity.
📸 Ugotowane przez społeczność
Zaloguj się, aby dodać zdjęcieDodaj zdjęcie gotowej potrawy
Po zatwierdzeniu przez moderatora otrzymasz 10 punktów doświadczenia.
Nikt jeszcze nie dodał zdjęcia. Bądź pierwszy!
Comments (0)
Be the first to comment on this recipe!
Add a comment