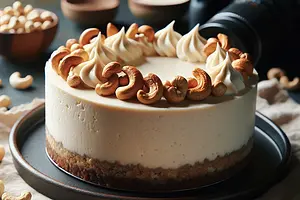
If you are using pecans, start by toasting them. Heat a dry skillet over medium heat. Add the nuts and toast them for 3-4 minutes, stirring or tossing the skillet frequently. They will be ready when they start to smell fragrant and lightly brown. Be careful not to burn them, as they will become bitter. Transfer them to a plate and let them cool completely, then chop coarsely with a knife.
Description
Here is a recipe for absolutely decadent homemade chocolate ice cream that will change your perception of frozen desserts. Its secret lies in the incredibly creamy texture, achieved without an ice cream maker, thanks to a base of sweetened condensed milk and whipped cream. The deep, intensely chocolate flavor comes from a combination of high-quality dark chocolate and cocoa powder. However, the real star of this dessert is the homemade salted caramel sauce, which weaves through the chocolate mixture in golden ribbons, creating the perfect balance of sweetness and salt. The whole is complemented by crunchy, toasted pecans, which add not only wonderful texture but also nutty depth. This is the perfect dessert for special occasions, summer afternoons, or simply when you crave something truly special. Serve it in chilled bowls to fully celebrate each spoonful.
Składniki (9)
- 36% heavy cream 620 ml
- Sweetened condensed milk 400 ml
- Bitter chocolate 70% 100 g
- Dark cocoa 30 g
- White sugar 150 g
- Masło 82% 60 g
- Vanilla extract 5 g
- 🌿 Przyprawy
- Coarse sea salt 5 g
- ✨ Opcjonalne
- Pecan nuts 80 g
💡 Kliknij na składnik aby oznaczyć jako użyty
Preparation steps
Preparation of toppings
Salted caramel sauce
Prepare the caramel sauce. In a heavy-bottomed saucepan, place the sugar and melt it over medium heat without stirring with a spoon. You can only gently swirl the entire saucepan to ensure the sugar melts evenly. Once all the sugar has melted and has a beautiful amber color (like tea), reduce the heat to the lowest setting. Add the diced butter. Note that the mixture will start to bubble and splatter intensely! Whisk vigorously with a kitchen whisk until the butter is completely combined with the caramel.
Now very carefully, slowly pour in 120 ml of 36% heavy cream in a thin stream into the caramel, while constantly stirring with a whisk. The mixture will bubble up again. Continue stirring over low heat for about 1-2 minutes, until the sauce becomes smooth and uniform. Remove the saucepan from the heat, add sea salt, and mix. Pour the sauce into a jar or bowl and set aside to cool completely at room temperature.
Chocolate base
Prepare the chocolate base. Break the chocolate into small pieces. Place it in a metal or glass bowl. Set the bowl over a pot of gently boiling water (a double boiler). The bottom of the bowl should not touch the surface of the water. Stir the chocolate occasionally until it is completely melted and smooth. Remove the bowl from the pot and set it aside for a few minutes to cool slightly.
In a large bowl, pour in the sweetened condensed milk. Sift dark cocoa powder into it through a fine sieve - this will prevent lumps from forming. Add vanilla extract. Mix everything thoroughly with a whisk until you have a smooth, uniform mixture. Then pour in the slightly cooled, melted chocolate and mix again until the ingredients are perfectly combined into a thick, glossy chocolate cream.
Preparation of the ice cream and assembly
In a separate, large, and well-chilled bowl, place the remaining 500 ml of cold heavy cream (36%). Use a hand mixer or stand mixer to whip the cream. Start at a low speed, gradually increasing to maximum. Whip until the cream becomes thick and forms stiff peaks (known as 'stiff tips') when the beaters are lifted. Be careful not to 'overwhip' it, as it will turn into butter.
Now combine both mixtures. Add about 1/3 of the whipped cream to the chocolate mixture and mix it quite vigorously with a whisk. This will 'loosen' the thick chocolate mixture. Then add the remaining whipped cream, but this time mix very gently using a silicone spatula. Use 'folding' motions (from the bottom of the bowl, along the sides, and over the top) so that the aerated cream does not deflate. Mix only until the ingredients are combined.
Prepare a freezing container (preferably a metal loaf pan with a capacity of about 1.5 liters). Spread 1/3 of the chocolate mixture on the bottom. Drizzle it with 1/3 of the cooled caramel sauce and sprinkle with 1/3 of the chopped pecans. Repeat these steps two more times to create layers. Finally, using the handle of a spoon or a skewer, make a few movements in the mixture to gently swirl the layers and create a marbled effect.
Smooth the top of the ice cream. Cover the surface of the mixture with a piece of parchment paper, pressing it gently so that it touches the ice cream. This will prevent ice crystals from forming. Then tightly wrap the entire container with plastic wrap or cover it with a lid. Place it in the freezer for at least 6-8 hours, preferably overnight, until the ice cream is completely frozen and firm.
Fun Fact
Ice cream without a machine, like this one, works on a simple physical principle. The high fat content (from the cream) and sugar (from the condensed milk) lowers the freezing point of water, which prevents the formation of large, hard ice crystals and allows for a creamy consistency even with slow freezing in a home freezer.
Best for
Tips
Serve the ice cream in bowls or cups that have been chilled in the freezer beforehand – this will help it melt more slowly. Before serving, you can drizzle it with any remaining caramel sauce, sprinkle with sea salt flakes, or grated dark chocolate. It pairs wonderfully with fresh raspberries, which will add a touch of acidity.
Store ice cream in the freezer in an airtight container, with a layer of parchment paper directly on the surface. It is best to consume it within 2 weeks. After a longer period, it may lose its perfectly creamy texture and absorb odors from the freezer.
📸 Ugotowane przez społeczność
Zaloguj się, aby dodać zdjęcieDodaj zdjęcie gotowej potrawy
Po zatwierdzeniu przez moderatora otrzymasz 10 punktów doświadczenia.
Nikt jeszcze nie dodał zdjęcia. Bądź pierwszy!
Comments (0)
Be the first to comment on this recipe!
Add a comment