Menu

Fluffy gluten-free bread with a hint of honey

Wegetariańskie Gluten-free cuisine Cakes and Bakes Additions 90 min Medium 11 wyświetleń ~10.33 PLN - (0)
Rate:
(0)

Description

Discover the magic of homemade bread anew with this recipe for an incredibly fluffy and moist gluten-free bread! Forget about hard, crumbly loaves from the store. This bread has a wonderfully soft crumb, a springy texture, and a delicately crispy, golden crust. A subtle hint of honey (or maple syrup) perfectly balances the flavors of the gluten-free flour blend, creating bread that is ideal for both sweet and savory toppings. This recipe is designed for those who miss the taste of real bread but need to avoid gluten. It works perfectly for breakfast, as a base for hearty sandwiches for work or school, and as an accompaniment to aromatic soups and salads. Its preparation is simpler than you think and does not require complicated kneading – the key to success is the right proportion of ingredients and a moment of patience during rising.

Składniki (12)

Servings:
6
  • White rice flour 250 g
  • Potato starch 120 g
  • Tapioca flour (cassava starch) 80 g
  • Psyllium husks 4 łyżki
  • Instant yeast 7 g
  • Ciepła woda 480 ml
  • Extra virgin olive oil 0.2 łyżek
  • Liquid honey 20 g
  • Apple cider vinegar 15 ml
  • 🌿 Przyprawy
  • Sól drobnoziarnista 1.6 łyżeczki
  • ✨ Opcjonalne
  • Sunflower seeds 15 g
  • Nasiona sezamu 1 łyżka
💰 Szacowany koszt dania: ~10.33 PLN (1.72 PLN/porcję)

💡 Kliknij na składnik aby oznaczyć jako użyty

Preparation steps

Preparing the base

1

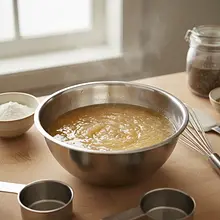
In a small bowl, place the psyllium husks. Pour in 200 ml of warm water (half of the total amount). Mix everything vigorously with a small whisk or fork to avoid lumps. Set aside for 5-10 minutes. During this time, the husks will absorb the water and turn into a thick, transparent gel. This is a key step that will give structure to your bread.

Ingredients: Psyllium husks, Ciepła woda
Use a small whisk, it's the best way to avoid lumps. Don't worry if the mixture looks strange – it should have the consistency of jelly or hair gel. Don't skip this step, without it the bread will be dry and crumbly.

Mixing the dough

2

In a large mixing bowl (or a regular large bowl), place all the dry ingredients: rice flour, potato starch, tapioca flour, instant yeast, and salt. Using a large spoon or whisk, mix thoroughly to ensure the ingredients are evenly combined. This will ensure that the yeast and salt are evenly distributed throughout the mixture.

Ingredients: White rice flour, Potato starch, Tapioca flour (cassava starch), Instant yeast, Sól drobnoziarnista
It's best to use a bowl from a stand mixer. If mixing by hand, use a large, stable bowl. Thoroughly mixing the dry ingredients is important to avoid clumps of salt or yeast in one spot.
3

To the remaining 280 ml of warm water, add honey, olive oil, and apple cider vinegar. Mix until the honey dissolves. Then pour this mixture and the previously prepared psyllium gel into the bowl with the dry ingredients.

Ingredients: Ciepła woda, Liquid honey, Extra virgin olive oil, Apple cider vinegar, Psyllium husks
Make sure the water is not too hot so as not to harm the yeast. The psyllium gel will be quite thick - use a silicone spatula to scrape it out of the bowl thoroughly.
4

Start mixing all the ingredients. If you are using a stand mixer, attach the 'K' attachment (flat beater) and mix on medium speed for about 5-7 minutes. If you are mixing by hand, use a very sturdy wooden spoon or spatula and mix vigorously for about 8-10 minutes. The gluten-free dough has a different consistency than traditional dough - it will be thick, sticky, and more resemble a thick paste or batter for a sponge cake than an elastic ball. This is completely normal!

Do not use a dough hook for yeast dough, it is ineffective for this consistency. The goal is to thoroughly aerate the mixture and combine the ingredients. The dough is ready when it is smooth (without dry lumps of flour) and cohesive. Do not try to knead it by hand on the countertop!

Rising

5

Prepare the baking pan. A standard loaf pan measuring about 25x12 cm will work best. Grease it thoroughly with oil or butter, then dust it with rice flour, shaking off the excess. Transfer the sticky dough to the pan using a spatula. Smooth the top with a wet hand or a damp spatula to achieve a nice, even shape.

Ingredients: Extra virgin olive oil, White rice flour
Thoroughly greasing and dusting the pan is key to ensuring the bread comes out easily after baking. Smoothing the surface with a damp hand is a great trick that prevents the dough from sticking and allows you to shape a nice loaf.
6

Cover the pan with a clean kitchen towel or plastic wrap and set it in a warm, draft-free place for about 30-45 minutes. The bread should rise noticeably, almost doubling in volume, and its top should be nicely rounded and reach the edges of the pan.

The ideal place for rising is a slightly warmed (up to 30°C) and turned-off oven with the light on. Do not let the dough rise for too long, as it may collapse during baking. The rising time depends on the ambient temperature.

Baking

7

At the end of the rising time, preheat the oven to 200°C (fan) or 220°C (top-bottom). Place a heatproof dish with hot water at the bottom of the oven. The steam generated during baking will make the crust of the bread crispier and more elastic, allowing it to rise better.

The oven must be well preheated before placing the bread inside. The trick with steam really works, don't skip it! Just a small loaf pan or a metal bowl with about 1 cup of boiling water is enough.
8

When the bread has risen, you can additionally brush the top with a little water or oil and sprinkle with your favorite seeds, such as sunflower and sesame. Place the loaf in the preheated oven on the middle rack. Bake for about 45-50 minutes.

Ingredients: Sunflower seeds, Nasiona sezamu
Sprinkling with seeds is optional, but it adds flavor and appearance. Baking time may vary slightly depending on the oven. The bread is ready when it has a deep golden-brown color, and when tapped on the bottom (after being removed from the pan), it sounds hollow.

Cooling

9

After baking, remove the bread from the oven and leave it in the pan for 5 minutes. Then carefully take it out of the pan (you can use a knife to help by loosening the edges) and transfer it to a metal rack to cool completely. This is an absolutely critical step! Hot gluten-free bread has a very delicate structure that needs to stabilize while cooling.

NEVER cut warm gluten-free bread! It will stick and crumble. You must wait at least 2-3 hours, or better yet, let it cool overnight. Patience will be rewarded with the perfect slice.

Fun Fact

💡

Psyllium (plantago ovata) is a plant native to the Mediterranean region. Its husks are almost pure fiber, capable of absorbing water many times its own weight, forming a gel. This property makes it a 'magic' ingredient in gluten-free baking, replacing the elasticity and structure normally provided by gluten.

Best for

Tips

🍽️ Serving

Cut the bread only after it has completely cooled, using a sharp serrated knife. Serve with good quality butter, avocado and a pinch of salt, homemade jam, or as a base for your favorite sandwiches. Slices can also be toasted in a toaster, becoming wonderfully crispy.

🥡 Storage

Store bread at room temperature, wrapped in a linen cloth or in a bread box, for 2-3 days. To extend its freshness, keep it in an airtight container in the refrigerator for up to 5 days. Bread freezes well – it's best to slice it, layer it with parchment paper, and freeze it in a zip-lock bag. Individual slices can be thawed in a toaster.

📸 Ugotowane przez społeczność

Zaloguj się, aby dodać zdjęcie
Dodaj zdjęcie gotowej potrawy

Po zatwierdzeniu przez moderatora otrzymasz 10 punktów doświadczenia.

🍲

Nikt jeszcze nie dodał zdjęcia. Bądź pierwszy!

Comments (0)

Be the first to comment on this recipe!

Add a comment

You might also like

Recipe Categories

Gluten-free cuisine is the answer to the needs of people with celiac disease and gluten intolerance. Our recipes use flours: rice, corn, buckwheat, almond, and coconut. Gluten-free bread that tastes like traditional - breads, rolls, baguettes, and focaccias. Pasta made from rice, buckwheat, and c...

See all recipes in this category

Homemade cakes and pastries are the heart of Polish culinary tradition - sweet memories from childhood. In our collection, you will find recipes for classic yeast cakes, shortcrust, sponge, and cheesecake. Apple pie, poppy seed cake, gingerbread, Easter babka, chocolate cake, and New York cheesec...

See all recipes in this category
Additions
Additions in: Christmas Eve Dinner

Side dishes complement main courses and influence the overall meal experience. In this category, we present recipes for potatoes, grains, rice, dumplings, and salads. Our dishes include classic Polish sides - kopytka, Silesian dumplings, mashed potatoes. You will also find modern alternatives - q...

See all recipes in this category

Breakfast is the most important meal of the day - energy for a good start and a tasty morning. Scrambled eggs, fried eggs, poached eggs, and omelets - protein classics. Oatmeal with fruits, nuts, and honey - a healthy and filling fit breakfast. American pancakes and French crepes - a sweet start ...

See all recipes in this category

Vegetarian cuisine is a wealth of flavors without meat - healthy, colorful, and filling. Plant-based proteins: lentils, chickpeas, beans, peas, and soy take center stage. Cheeses and dairy: feta, halloumi, ricotta, and mascarpone in main dishes. Eggs in various forms: omelets, frittata, shakshuka...

See all recipes in this category
Reklama