Menu

Creamy Cheesecake Ice Cream with Raspberries and White Chocolate (no machine)

Wegetariańskie Desery Desserts for Kids Dishes for Special Occasions 390 min Medium 10 wyświetleń ~72.73 PLN - (0)
Rate:
(0)

Description

Discover the magic of homemade ice cream without the need for a specialized machine! This recipe is the essence of a creamy dessert that combines the richness of classic cheesecake with the refreshing, slightly tangy note of raspberries and the sweetness of melting white chocolate. The ice cream has an incredibly smooth, velvety texture thanks to the mascarpone cheese and whipped cream base. Each spoonful is a journey through layers of flavors and textures: from the silky cheese mixture, through the intense homemade raspberry sauce, to the crunchy pieces of cookies and sweet white chocolate shavings. Perfect for a summer afternoon, an elegant dessert after dinner, or simply as a moment of sweet indulgence. Serve it in bowls, cones, or as a topping for warm brownies.

Składniki (11)

Servings:
8
  • 36% heavy cream 500 ml
  • Serek mascarpone 250 g
  • Serek śmietankowy typu philadelphia 200 g
  • Powdered sugar 150 g
  • Raspberries 200 g
  • Granulated sugar 50 g
  • Lemon juice 15 ml
  • White chocolate 100 g
  • Butter cookies 80 g
  • Vanilla extract 10 g
  • ✨ Opcjonalne
  • Świeże listki mięty 5 g
💰 Szacowany koszt dania: ~72.73 PLN (9.09 PLN/porcję)

💡 Kliknij na składnik aby oznaczyć jako użyty

Preparation steps

Preparation of raspberry sauce

1

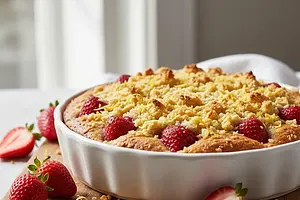
In a small saucepan with a thick bottom, place the raspberries (if using frozen, you do not need to thaw them beforehand), granulated sugar, and freshly squeezed lemon juice. Heat over medium heat, stirring occasionally with a wooden spoon, until the sugar is completely dissolved and the raspberries start to break down and release their juice. This will take about 5-7 minutes.
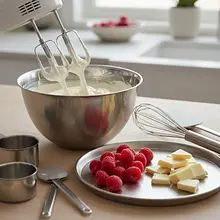
Ingredients: Raspberries, Granulated sugar, Lemon juice
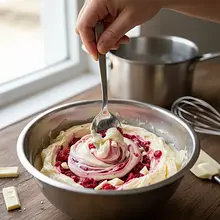
Use a non-stick saucepan to prevent the sauce from burning. Stir regularly, scraping the mixture from the bottom and sides of the pan. Do not set the burner to too high a power, so the sugar caramelizes instead of dissolving.
2

Increase the burner power and bring the sauce to a boil. Cook for another 5-8 minutes, stirring often, until the sauce noticeably thickens. It should have the consistency of a thin syrup – remember that it will become even thicker as it cools. Remove the saucepan from the heat and let the sauce cool COMPLETELY. This is very important because a warm sauce would melt the ice cream.

To check the thickness, scoop a bit of the sauce onto a spoon that has been chilled in the freezer. If the sauce does not run off it in a steady stream after a moment, it is ready. To speed up the cooling, transfer the sauce to a cold bowl and place it in the refrigerator.

Preparation of the cheesecake filling

3

In a large, chilled bowl, place very cold 36% heavy cream. Using a hand mixer or stand mixer with a whisk attachment, start whipping the cream on low speed. Gradually increase the speed to maximum. Whip for about 3-5 minutes until the cream becomes thick and fluffy, and when you remove the beaters, stiff peaks (known as 'stiff tips') will hold their shape.

Ingredients: 36% heavy cream
The key to success is low temperature! Chill the bowl and mixer attachments in the fridge for 15 minutes before whipping. Be careful not to 'overwhip' the cream (whipping too long), as the fat will separate from the water and butter will form. Stop whipping as soon as it reaches the desired stiff consistency.
4

In a second, large bowl, place the mascarpone cheese and cream cheese (both at room temperature). Add the sifted powdered sugar and vanilla extract. Using a mixer on low speed (you can use the same beaters without washing), mix the ingredients just until they combine into a uniform, smooth, and creamy mixture. This usually takes no longer than 1 minute.

Ingredients: Serek mascarpone, Serek śmietankowy typu philadelphia, Powdered sugar, Vanilla extract
Using cream cheese at room temperature will prevent lumps from forming. Sifting the powdered sugar also ensures a perfectly smooth mixture. Do not mix for too long, as the cheese mixture may become too runny.
5

Add 1/3 of the whipped cream to the cheese mixture and gently but thoroughly mix with a silicone spatula to loosen the consistency of the cheese. Then add the remaining whipped cream. Now very gently combine both mixtures, using sweeping motions from the bottom of the bowl upwards (the so-called folding method). Mix only until the ingredients are combined. The goal is to retain as much air from the whipped cream as possible.

Use a wide, flexible spatula. Imagine that you are 'folding' the mixture in half, turning the bowl every few movements. Too vigorous mixing will destroy the air bubbles, and the ice cream will be hard and dense instead of fluffy.

Combining and Freezing

6

Prepare the toppings. Chop the white chocolate with a sharp knife on a cutting board into irregular, small pieces. Place the biscuits in a ziplock bag, seal it, and gently crush them with a rolling pin or the bottom of a heavy glass into smaller and larger crumbs. Also, prepare a freezing container – a metal loaf pan or a plastic container with a capacity of about 1.5 liters works best.

Ingredients: White chocolate, Butter cookies
Do not crumble the biscuits into dust – we want to achieve pieces of different sizes for an interesting texture. A metal mold conducts cold faster, which will speed up the freezing process.
7

Pour half of the cheesecake mixture into the prepared container and smooth the surface with a spatula. On top, place dollops of half of the cooled raspberry sauce. Sprinkle with half of the chopped white chocolate and half of the crushed biscuits. Cover everything with the remaining cheesecake mixture. On top, again place dollops of the remaining raspberry sauce and sprinkle with the rest of the chocolate and biscuits.

Spread the sauce blobs at even intervals to create a nice pattern. Do not pour all the sauce in one spot, as it will sink to the bottom.
8

Using the handle of a spoon or a skewer, make a few gentle swirling motions in the ice cream mixture to create a marbled effect (the so-called 'swirl'). Do not mix too much; 3-4 motions are enough to avoid completely combining the sauce with the mixture. Cover the container tightly with a lid or double layer of plastic wrap, pressing it against the surface of the ice cream to prevent ice crystals from forming.

The marble effect is key to a beautiful presentation. Overmixing will cause the ice cream to become uniformly pink. Place the foil directly on the mixture to limit air exposure.
9

Place the container in the freezer for at least 6-8 hours, preferably overnight. The ice cream must completely set. Before serving, take the ice cream out of the freezer for about 10-15 minutes to soften slightly, making it easier to scoop. Serve in bowls or cones, optionally garnished with fresh mint leaves.

Ingredients: Świeże listki mięty
Use an ice cream scoop dipped briefly in hot water to form perfect balls. The ice cream will be best within the first two weeks of storage in the freezer.

Fun Fact

💡

The method of making ice cream without a machine, based on whipped cream and a sweetened base (often condensed milk), gained immense popularity in the 1930s in the United States. It was a simple and accessible alternative to expensive and complicated ice cream machines, allowing everyone to enjoy homemade dessert.

Best for

Tips

🍽️ Serving

Serve the ice cream in chilled bowls to slow down melting. You can drizzle it with an extra portion of raspberry sauce or melted white chocolate. It also pairs wonderfully with fresh berries. For adults, you can add a splash of Chambord liqueur to the raspberry sauce.

🥡 Storage

Store ice cream in an airtight container in the coldest part of the freezer (usually at the back). To prevent ice crystals from forming, always cover the surface of the ice cream with a piece of parchment paper or plastic wrap before sealing the container. Store for up to 1 month, although it is best within the first 2 weeks.

📸 Ugotowane przez społeczność

Zaloguj się, aby dodać zdjęcie
Dodaj zdjęcie gotowej potrawy

Po zatwierdzeniu przez moderatora otrzymasz 10 punktów doświadczenia.

🍲

Nikt jeszcze nie dodał zdjęcia. Bądź pierwszy!

Comments (0)

Be the first to comment on this recipe!

Add a comment

You might also like

Recipe Categories

Desery
Desery in: Sylwester

Słodkie zakończenie sylwestrowej kolacji to must-have, które wprowadzi wszystkich w radosny nastrój na nowy rok.

See all recipes in this category
Desserts for Kids
Desserts for Kids in: For Kids

Desserts for kids are sweet treats without guilt - less sugar, more flavor. Banana ice cream without sugar - frozen bananas blended to a creamy consistency. Chocolate mousse with avocado - creamy and healthy. Vanilla pudding with fruit - a childhood classic. Carrot and apple muffins - hidden vege...

See all recipes in this category

Dishes for special occasions are culinary masterpieces for birthdays, anniversaries, and holidays. Grilled beef steak with herb butter - restaurant quality at home. Beef Wellington - beef in puff pastry with duxelles. Roast duck with apples - a holiday tradition in a new edition. Pink salmon with...

See all recipes in this category
Reklama