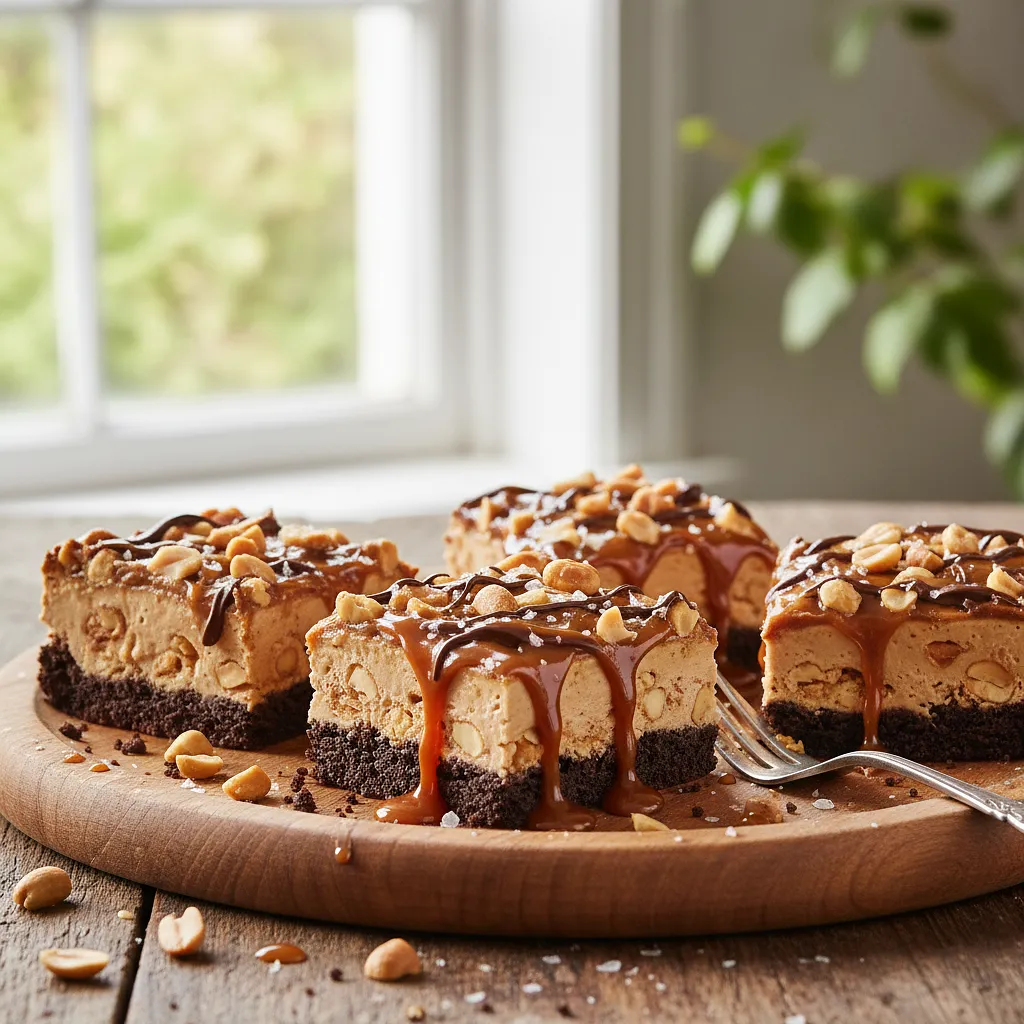
Here’s a dessert that will revolutionize your concept of homemade sweets! Caramel-Nut Fantasy is a luxurious no-bake bar inspired by the iconic Snickers, but in a much richer and more sophisticated version. It consists of four perfectly composed layers that together create a symphony of flavors and textures. At the very bottom is a crunchy, sweet-and-salty base made of crushed pretzels and biscuits, which serves as the perfect counterpoint to the sweeter layers. Next, a velvety, chewy layer of homemade peanut butter nougat that melts in your mouth. The heart of the dessert is a thick, incredibly delicious layer of golden caramel, filled to the brim with crunchy, roasted peanuts. The entire creation is topped with a glossy glaze made from a mix of dark and milk chocolate, which perfectly balances the sweetness. This dessert is not only delicious but also visually impressive. It’s perfect for special occasions, parties, or as a weekend treat when you crave something truly special without wanting to turn on the oven.
Prepare a square baking pan measuring 20x20 cm. Line it with two pieces of parchment paper, creating a 'cross'. Make sure the paper extends beyond the edges of the pan – this will make it easy to remove the finished cake. Press the paper firmly against the bottom and corners.
Use a metal or glass pan. The protruding 'handles' from the paper are the key to success! If the paper doesn't want to stick, grease the pan with a little butter before lining it.
2
In a food processor or blender, place the biscuits and pretzels. Pulse blend until you achieve a fine sand texture with visible small pieces. If you don't have a food processor, place them in a thick ziplock bag, seal it, and crush with a rolling pin. In a small saucepan, melt 100g of butter over low heat. Transfer the crushed cookies to a bowl, pour in the melted butter, and mix thoroughly with a spoon until all the crumbs are moist.
Do not blend to a powder – small pieces of pretzels will add texture. When mixing with the butter, make sure it reaches the bottom of the bowl. The mixture should resemble wet sand.
3
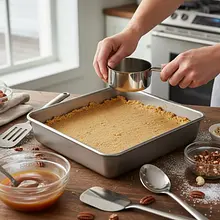
Transfer the cookie dough to the prepared pan. Spread it evenly, then press it firmly to the bottom using the bottom of a glass or a spoon. Create an even, compact layer. Place the pan in the refrigerator for at least 30 minutes to allow the base to set.
This is an important step! A well-beaten base will prevent the dessert from crumbling when cutting. Use a glass with a flat bottom to achieve a perfectly even surface.
Nougat layer
4
In a large pot with a thick bottom, place the marshmallows. Heat on low power, constantly stirring with a silicone spatula, until the marshmallows are completely melted and a smooth, sticky mixture forms. Remove the pot from the heat. Immediately add the peanut butter and mix vigorously until the ingredients are combined. Then add the sifted powdered sugar and stir until a uniform, thick mixture is achieved.
Ingredients:
Mini marshmallows, Peanut butter, Powdered sugar
Use a non-stick pot, it will make your work much easier. Stir continuously, as the foam can easily burn. Work quickly, as the mixture sets fast. You can lightly grease the spatula with oil to prevent the mixture from sticking to it.
5
Remove the pan with the base from the refrigerator. Transfer the warm nougat mixture onto the chilled base. Spread it evenly using a greased spatula or spoon. Smooth the surface. Place the pan back in the refrigerator for another 30 minutes.
Greasing the spatula is crucial; otherwise, the mixture will stick to it and tear. Press the mixture against the edge of the mold to avoid any empty spaces.
Caramel and Nut Layer
6
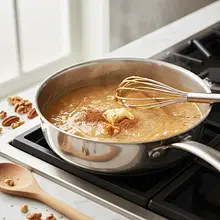
In a medium saucepan with a thick bottom, place 60g of butter, brown sugar, condensed milk, and two pinches of salt. Heat over medium power, stirring constantly with a wooden spoon or whisk, until the butter and sugar dissolve. Increase the heat and bring the mixture to a boil, continuing to stir. Cook for 5-7 minutes, stirring, until the caramel thickens and takes on an amber color. It should fall in a thick stream from the spoon.
Ingredients:
Unsalted butter, Brown sugar, Sweetened condensed milk, Sól drobnoziarnista
Use a pot larger than the volume of the ingredients, as the mixture will bubble. Stir constantly, especially at the bottom, to prevent burning. Be careful, the caramel is extremely hot! You will know it's ready when it has thickened and slightly darkened.
7
Remove the pot with caramel from the heat. Wait a minute, then add the roasted peanuts. Mix thoroughly to ensure all the peanuts are coated in caramel. Take the mold out of the fridge and pour the hot caramel-nut mixture over the layer of nougat. Quickly spread it evenly. Set aside to cool completely at room temperature (about 1 hour), then place in the fridge for at least 2 hours, preferably 3-4, to allow the caramel to firm up well.
Ingredients:
Peanuts
Work carefully, the mixture is very hot. When spreading the caramel, try not to disturb the nougat layer. Patience is key - the caramel must be completely cold and hard before pouring the chocolate.
Chocolate glaze and finishing touches
8
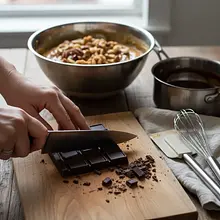
When the caramel is hard, prepare the glaze. Finely chop both chocolates and place them in a heatproof bowl. Add the coconut oil. Melt the chocolate in a water bath (placing the bowl over a pot of gently boiling water, making sure the bottom of the bowl does not touch the water) or in the microwave (in 30-second intervals, stirring each time). Stir until you achieve a smooth, glossy glaze.
Ingredients:
Dark chocolate min. 70%, Milk chocolate, Coconut oil
Do not let even a drop of water get into the chocolate, as it will seize. If you are using a microwave, do not overheat the chocolate, as it will become dull and thick. Coconut oil will provide a beautiful shine.
9
Remove the mold from the refrigerator. Pour the melted chocolate over the hardened layer of caramel. Gently tilting the mold, spread the topping over the entire surface. If you are using flaked salt, sprinkle it on top immediately before the chocolate sets. Place the cake in the refrigerator for the last 30-60 minutes to allow the topping to harden completely.
Ingredients:
Sea salt
Work quickly, as the cold caramel will cause the chocolate to start setting rapidly. Flaky salt is not only for flavor but also a beautiful decoration. Don't skip this step if you enjoy sweet and salty combinations!
10
When the topping is hard, grab the protruding ends of the parchment paper and carefully remove the entire block of dessert from the mold. Transfer it to a cutting board. Dip a long, sharp knife in hot water, wipe it dry, and cut the dessert into squares (e.g., 4x4, yielding 16 portions). Repeat dipping and wiping the knife before each cut to achieve perfectly even edges.
The hot knife technique is absolutely key! Thanks to it, the chocolate won't crack, and the layers will remain intact. Cutting a cold dessert with a cold knife will simply end in a mess.
Fun Fact
💡
The combination of chocolate, caramel, and peanuts became a global phenomenon thanks to the Snickers bar, which was introduced to the market in 1930 by Mars. The name of the bar comes from the name of the Mars family's favorite horse!
The bars taste best slightly chilled, straight from the fridge. Serve them on small dessert plates with a cup of black coffee, which perfectly balances their sweetness. For added decadence, you can serve a portion with a small scoop of vanilla ice cream.
🥡Storage
Store the cut bars in an airtight container in the refrigerator. It's best to layer them, placing parchment paper between each layer to prevent sticking. In these conditions, they will stay fresh and maintain the perfect texture for up to 7 days.
Homemade cakes and pastries are the heart of Polish culinary tradition - sweet memories from childhood. In our collection, you will find recipes for classic yeast cakes, shortcrust, sponge, and cheesecake. Apple pie, poppy seed cake, gingerbread, Easter babka, chocolate cake, and New York cheesec...
Dishes for special occasions are culinary masterpieces for birthdays, anniversaries, and holidays. Grilled beef steak with herb butter - restaurant quality at home. Beef Wellington - beef in puff pastry with duxelles. Roast duck with apples - a holiday tradition in a new edition. Pink salmon with...
New Year's Eve is a special time when we bid farewell to the old year and welcome the new one with great joy and hope. It is an extraordinary occasion that brings loved ones together at the table, where delicious dishes and drinks are a must. Traditionally, we celebrate this evening with a variet...


Comments (0)
Be the first to comment on this recipe!
Add a comment