Menu

Precise Pixel Cookies with Lavender Royal Icing

Desserts Cakes and Bakes Dishes for Special Occasions 180 min Medium 10 wyświetleń ~22.43 PLN - (0)
Rate:
(0)

Description

Here is a recipe that combines a love for baking with a passion for precision and modern design. Precision Pixel Cookies are small, square, buttery wonders that retain perfectly sharp edges after baking, becoming a canvas for your creativity. Their flavor is classic and deeply buttery, with a subtle hint of vanilla, and the crumbly texture literally melts in your mouth. The real magic begins with decoration – we cover them with velvety royal icing, subtly flavored with edible lavender. This unexpected addition brings an elegant, floral note that perfectly balances the sweetness of the icing. Visually, the cookies resemble pixels from a computer screen, allowing for the creation of edible mosaics and patterns. Perfect for themed parties, as a gift for a geek, or simply as a project that allows you to relax and focus on detail. Serve them with a cup of Earl Grey or white tea to fully appreciate their lavender aroma.

Składniki (11)

Servings:
8
  • Mąka pszenna tortowa typ 450 300 g
  • Butter 200 g
  • Powdered sugar 200 g
  • Egg yolk 2.2 szt.
  • Białko jaja 1.2 szt.
  • Vanilla extract 5 g
  • Lemon juice 5 ml
  • 🌿 Przyprawy
  • Salt 0.1 szczypt
  • Dried lavender flowers 1 łyżeczka
  • ✨ Opcjonalne
  • Purple gel food coloring 1 g
  • Edible glitter 1 szczypta
💰 Szacowany koszt dania: ~22.43 PLN (2.80 PLN/porcję)

💡 Kliknij na składnik aby oznaczyć jako użyty

Preparation steps

Crispy Pixel Cake

1

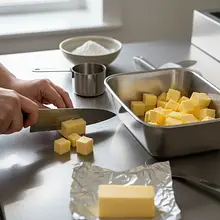
Prepare the dry ingredients. In a large bowl, sift the all-purpose flour and 100g of powdered sugar. Sifting is important as it aerates the ingredients and removes any lumps, resulting in a more delicate cake texture. Add two pinches of salt and mix everything thoroughly with a whisk or spoon to ensure the ingredients are evenly distributed.

Ingredients: Mąka pszenna tortowa typ 450, Powdered sugar, Salt
Use a fine mesh strainer. Accurately measuring ingredients with a kitchen scale is the first step to success. Don't skip the salt – it brings out the full flavor.
2

Add cold butter. Take the butter out of the fridge and cut it into small cubes (about 1x1 cm). Toss the butter cubes into the bowl with the dry ingredients. Now you need to combine the butter with the flour. You can do this in two ways: with your fingers, quickly rubbing the butter into the flour until it reaches the consistency of wet sand or crumbs, or using a pastry cutter. The key is to work quickly so that the butter doesn't warm up.

Ingredients: Butter
The easiest and quickest way is to use a food processor with an 'S' blade. Just a few pulse movements are enough. Avoid excessive heating of the dough with your hands, as warm butter will make the cookies hard after baking and cause them to spread, losing their shape.
3

Combine the dough. In a small bowl, lightly beat two egg yolks with vanilla extract using a fork. Make a well in the center of the crumble and pour the mixture in. Now, very quickly knead the dough, just until the ingredients come together into a uniform, smooth ball. Do not knead for long! As soon as the dough stops sticking and forms a cohesive whole, stop kneading.

Ingredients: Egg yolk, Vanilla extract
Use a silicone spatula to initially combine the liquid ingredients with the dry ones, and only then quickly knead the dough with your hands. Overworking shortcrust pastry leads to gluten development, resulting in hard rather than crumbly cookies.
4

Chill the dough. Flatten the formed ball of dough into a disk about 2-3 cm thick. This will help it chill faster and more evenly. Wrap the disk tightly in plastic wrap and place it in the refrigerator for at least 60 minutes. The dough can be stored in the fridge for up to 2 days.

Cooling is absolutely crucial. It allows the butter to harden again, which prevents the cookies from spreading during baking and ensures they maintain their perfect square shape. Do not skip this step!

Shaping and Baking

5

Roll out the dough. Take the chilled dough out of the refrigerator. Prepare a large sheet of baking paper and lightly dust it with flour. Place the dough on it, dust the top as well, and cover it with a second sheet of paper. Roll the dough into a flat disc with a consistent thickness of about 4 mm. Rolling between two sheets of paper prevents sticking and eliminates the need to add a large amount of flour.

Ingredients: Mąka pszenna tortowa typ 450
To achieve a perfectly even thickness across the entire surface, use a rolling pin with adjustable spacer rings or place two strips of wood, each 4 mm thick, on the sides of the dough. The perfect thickness ensures even baking.
6

Cut the pixels. Remove the top sheet of paper. Using a long ruler and a sharp knife or pizza cutter, cut the dough into perfect squares measuring 2x2 cm. Work quickly to keep the dough cold. Remove excess dough from the edges (you can re-knead it, chill it, and roll it out again).

The best tools will be a long metal ruler and a pizza cutter – this will ensure straight and clean cuts. If the dough starts to get soft, place it with the paper in the fridge for 10 minutes before you start removing the excess.
7

Chill the cookies again. Move the paper with the cut squares onto a large baking sheet. Place the sheet in the freezer for 15 minutes or in the fridge for 30 minutes. This step is to 'secure' the perfect shape. Frozen cookies placed in a hot oven won't have time to spread before they bake.

You can prepare two trays and bake them alternately. While one batch is baking, the other can cool. This significantly streamlines the process.
8

Bake the cookies. Preheat the oven to 170°C (fan) or 180°C (top-bottom). Place the chilled baking sheet with cookies in the preheated oven. Bake for about 10-12 minutes. The cookies are ready when their edges start to turn a light golden color, while the center remains pale. After removing from the oven, leave them on the baking sheet for 5 minutes, then carefully transfer to a rack to cool completely.

Every oven bakes differently, so keep an eye on the cookies towards the end of baking. Overbaking will cause them to lose their tenderness. Cooling on a rack allows air circulation from underneath, which prevents them from 'steaming' and maintains their crispness.

Lavender Royal Icing

9

Prepare lavender sugar. In a small, clean coffee grinder or mortar, place the dried lavender flowers and one tablespoon (about 15g) of powdered sugar from the measured portion. Blend or grind everything into a fine, aromatic powder. This will help release the essential oils from the lavender and evenly distribute its flavor in the icing.

Ingredients: Dried lavender flowers, Powdered sugar
Make sure the grinder is perfectly clean and dry so it doesn't have a coffee smell. You can wipe it with a dry paper towel. This step is crucial for achieving a deep, rather than superficial, lavender aroma.
10

Start whipping the icing. Pour the egg white into a perfectly clean, degreased bowl (e.g., glass or metal). Begin whipping it with a mixer on low speed. When the egg white starts to foam, add the lemon juice. Then, without stopping the whipping, start adding the remaining powdered sugar (the remaining 85g) and the lavender sugar, one tablespoon at a time. Do this slowly, waiting for each portion to combine with the mixture.

Ingredients: Białko jaja, Lemon juice, Powdered sugar
The bowl and mixer attachments must be absolutely free of grease; otherwise, the egg whites will not whip. You can wipe them with a cotton pad soaked in vinegar or lemon juice, and then dry them thoroughly. Patience when adding sugar is key to achieving a smooth consistency of the icing.
11

Achieve the perfect consistency. After adding all the sugar, increase the mixer speed to medium and beat the icing for about 5-7 minutes. The finished icing should be thick, white, shiny, and smooth. The ideal consistency for filling cookies ('flood consistency') is when a stream of icing flowing from the spoon dissolves on the surface within 10-15 seconds. If it is too thick, add a few drops of water. If it is too thin, add a little powdered sugar.

Ingredients: Purple gel food coloring
If you want, at this stage you can add a bit of purple gel food coloring. Add it with a toothpick, a minimal amount at a time, and mix thoroughly until you achieve the desired pastel shade of lavender. Remember that the color will be slightly more intense once dried.

Decorating Pixels

12

Get ready to decorate. Transfer the prepared icing into a piping bag with a small round tip (nib) with a diameter of about 1-2 mm. If you don't have a piping bag, you can use a sturdy ziplock bag with a tiny corner cut off. Prepare all the cooled cookies on a flat surface, e.g., on a baking sheet lined with parchment paper.

If you don't use all the icing right away, cover the bowl with a damp cloth or plastic wrap touching the surface of the icing. This will prevent a hard crust from forming. Work in batches to keep the icing in the piping bag from drying out.
13

Fill the cookies with icing. Holding the piping bag perpendicular to the cookie, first outline the contour of each square, leaving about a 1 mm margin from the edge. Then, starting from the outside and moving towards the center, fill in the outlined shape with icing, making zigzag motions. If air bubbles form, gently poke them with a toothpick.

After applying the icing, you can gently shake the cookie from side to side to level the surface of the icing. The key is a steady hand and even pressure on the piping bag. Take your time, this should be a relaxing part of the process!
14

Dry the icing. Place the decorated cookies in a dry and airy place for at least 8-12 hours, preferably overnight. The icing must harden completely to a stone-like consistency, including the inside. Only then can the cookies be safely packed or stacked on top of each other.

Ingredients: Edible glitter
Do not put the cookies in the fridge to speed up the drying – a humid environment will cause the icing to stick. Patience is key. If you want, you can sprinkle the cookies with edible glitter while the icing is still wet, right after applying it.

Fun Fact

💡

Royal Icing got its name in the 19th century in England when it was used to decorate Queen Victoria's wedding cake. Its impeccably white and smooth appearance was deemed worthy of a royal table and has since become a standard in luxury confectionery.

Best for

Tips

🍽️ Serving

Arrange the cookies on a large, flat tray or board, creating a larger image in pixel art style – a heart, a character from a game, or a simple message. They will look stunning! Serve them with a delicately flavored tea (e.g., white or jasmine) that won't overpower the subtle aroma of lavender.

🥡 Storage

Once the icing has completely dried, the cookies can be stored in an airtight metal or glass container at room temperature for up to 2 weeks. It is advisable to separate each layer of cookies with parchment paper to avoid any potential scratches on the icing.

📸 Ugotowane przez społeczność

Zaloguj się, aby dodać zdjęcie
Dodaj zdjęcie gotowej potrawy

Po zatwierdzeniu przez moderatora otrzymasz 10 punktów doświadczenia.

🍲

Nikt jeszcze nie dodał zdjęcia. Bądź pierwszy!

Comments (0)

Be the first to comment on this recipe!

Add a comment

You might also like

Recipe Categories

Desserts
Desserts in: Christmas Eve Dinner

Desserts are a sweet ending to a meal that brings joy to both children and adults. In this category, we present recipes for a variety of sweets - from simple creams and mousses, to elegant panna cottas, and exquisite fruit tarts. Our desserts include both classics of Polish cuisine - fruit jelly,...

See all recipes in this category

Homemade cakes and pastries are the heart of Polish culinary tradition - sweet memories from childhood. In our collection, you will find recipes for classic yeast cakes, shortcrust, sponge, and cheesecake. Apple pie, poppy seed cake, gingerbread, Easter babka, chocolate cake, and New York cheesec...

See all recipes in this category

Dishes for special occasions are culinary masterpieces for birthdays, anniversaries, and holidays. Grilled beef steak with herb butter - restaurant quality at home. Beef Wellington - beef in puff pastry with duxelles. Roast duck with apples - a holiday tradition in a new edition. Pink salmon with...

See all recipes in this category
Desserts for Kids
Desserts for Kids in: For Kids

Desserts for kids are sweet treats without guilt - less sugar, more flavor. Banana ice cream without sugar - frozen bananas blended to a creamy consistency. Chocolate mousse with avocado - creamy and healthy. Vanilla pudding with fruit - a childhood classic. Carrot and apple muffins - hidden vege...

See all recipes in this category
Reklama