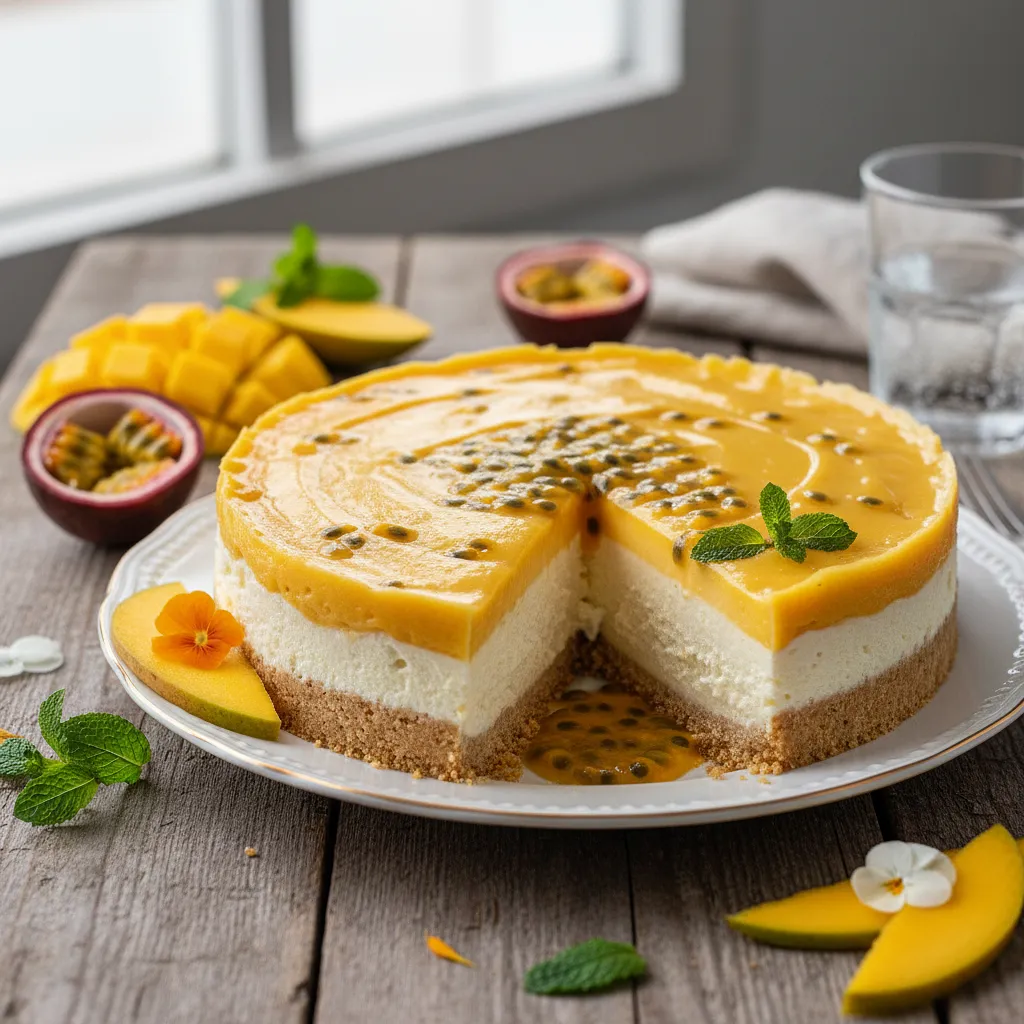
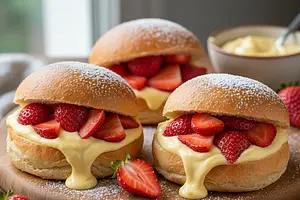
Here is a dessert that is the essence of summer captured in an elegant form. The Velvety Yogurt Cheesecake No-Bake is the perfect choice for anyone looking for refreshment and light sweetness without having to turn on the oven. Its base is a crunchy, buttery crust made from cookies, which provides an excellent contrast to the creamy, slightly tangy filling made from thick Greek yogurt. It is the yogurt that gives it an extraordinary lightness and freshness, setting it apart from traditional, heavy cheesecakes. However, the true star of this dessert is the topping – an intensely fruity, exotic mousse made from ripe mango and aromatic passion fruit. Its sunny color and tropical flavor transport you to the farthest corners of the world. The cheesecake looks stunning, with clearly defined three layers, and while its preparation requires a bit of patience and precision, it is achievable even for beginner bakers. It is perfect for summer parties, family celebrations, or as a refined dessert after dinner.
Prepare a 24 cm diameter springform pan. Line the bottom of the pan with parchment paper. To do this, place a sheet of paper at the bottom of the springform pan, then tighten the ring around it. Trim any excess paper hanging outside with scissors. Do not grease the sides.
Using parchment paper on the bottom will make it easier to transfer the cheesecake to a serving platter later. A springform pan is essential for this recipe.
2
Place the biscuits in a food processor (kitchen machine with an 'S' blade) and blend into fine crumbs. If you don't have a food processor, put the biscuits in a sturdy zip-lock bag, seal it while removing excess air, and crush them thoroughly with a rolling pin or meat mallet until you achieve a wet sand consistency.
Ingredients:
Biscuits
Try to achieve the finest crumb structure possible, without large pieces. This will ensure that the base is compact and won't crumble when cutting.
3
Melt the butter in a small saucepan over low heat or in the microwave. Be careful not to burn it; it should just be liquid. Add the melted butter and a pinch of salt to the bowl with the crushed biscuits. Mix everything very thoroughly with a spoon until all the crumbs are moist and stick together when pressed in your hand.
Ingredients:
Butter, Salt
Salt at the bottom is the secret ingredient that wonderfully balances sweetness and enhances the buttery flavor. Stir vigorously to ensure the butter evenly coats all the biscuits.
4
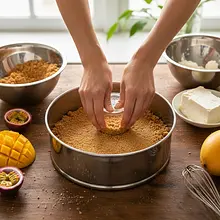
Transfer the biscuit mixture to the prepared springform pan. Evenly spread it across the entire bottom, then press it down very firmly using the bottom of a glass or a spoon. Create an even, compact layer. Place the springform pan in the refrigerator for at least 30 minutes to allow the base to set.
A precise and firm pressing of the mixture is key to the stability of the base. The better you press it, the less it will crumble. Cooling in the fridge will cause the butter to set and bind everything together.
Preparation of the yogurt mixture
5
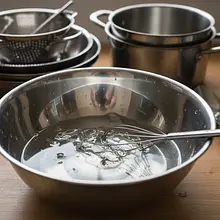
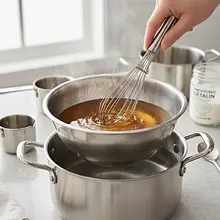
Prepare the gelatin for the yogurt mixture. In a small bowl, add 20g of gelatin and pour in 100 ml of cold water. Mix thoroughly and set aside for about 10 minutes, until the gelatin swells and absorbs all the water, forming a thick, 'sponge-like' mass.
Ingredients:
Gelatin, Water
Always use cold water to soak the gelatin. Warm water will cause lumps to form. This is an important step that cannot be skipped.
6
Soak the gelatin and then heat it until it becomes liquid. You can do this in the microwave (heating in short, 10-second intervals and stirring) or in a water bath (placing a bowl over a pot of hot water). Stir until all the lumps dissolve and the gelatin is perfectly liquid and clear. Set aside for a moment to cool slightly.
Ingredients:
Gelatin
ABSOLUTELY DO NOT BOIL THE GELATIN! Too high a temperature will cause it to lose its gelling properties. It should only be warm and liquid.
7
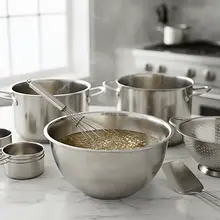
In a large bowl, place thick Greek yogurt, powdered sugar, vanilla extract, and freshly grated lemon zest. Using a whisk or mixer on low speed, mix everything just until the ingredients are combined into a uniform, smooth mixture.
Use Greek yogurt straight from the fridge. Do not mix the mixture too long to avoid incorporating too much air at this stage.
8
In a separate, clean, and dry bowl, place very well-chilled 30% cream. Whip it with a mixer on high speed until stiff. The finished foam should be thick and hold its shape, but be careful not to 'overwhip' it (whip for too long), as it will turn into butter.
Ingredients:
30% heavy cream
The bowl and the mixer attachments should also be chilled - this will speed up and make whipping easier. Stop whipping when the peaks form stiff tips after removing the beaters.
9
Now the key moment - tempering the gelatin. Add 2-3 large tablespoons of the yogurt mixture to the still liquid, slightly warm gelatin in a bowl. Whisk everything vigorously until you achieve a uniform consistency. Then, pour the prepared mixture in a thin stream into the remaining yogurt mixture, while continuously mixing it with a hand mixer on low speed or a whisk.
Ingredients:
Gelatin, Greek yogurt
Hardening prevents the formation of gelatin 'clumps' in the cold mixture. Never pour hot gelatin directly into a large amount of cold yogurt! Temperature equalization is essential.
10
Add the whipped cream to the yogurt mixture with gelatin. Do this in batches, in 2-3 rounds. Very gently mix everything together using a large spatula or spoon, making movements from the bottom of the bowl upwards. The goal is to combine the ingredients while preserving as much air from the whipped cream as possible.
Ingredients:
30% heavy cream
Do not use the mixer anymore! It would destroy the fluffy structure of the cream. The technique of gentle folding is key to achieving a light and airy consistency in the cheesecake.
11
Pour the finished, smooth yogurt mixture onto the chilled biscuit base in the springform pan. Smooth the top with a spatula. Place the cheesecake in the refrigerator for at least 2-3 hours, or preferably until the mixture is completely set and firm to the touch.
You can gently tap the springform pan on the countertop to release any air bubbles and achieve a perfectly smooth surface.
Preparation of fruit mousse
12
When the yogurt mixture thickens, prepare the mousse. Peel the mango, separate the flesh from the pit, and blend it into a smooth purée. Cut the passion fruits in half and scoop out the pulp with seeds using a teaspoon. Combine the mango purée with the passion fruit pulp. If you don't like the seeds, you can strain the passion fruit pulp through a fine sieve.
Ingredients:
Mango pulp, Passion fruit pulp
Use very ripe fruits, they will be the sweetest and most aromatic. The amount of sugar in the puree can be adjusted depending on the natural sweetness of the fruits.
13
In a small bowl, add 10g of gelatin and pour in 50 ml of cold water. Mix and set aside for 10 minutes to swell, just like with the yogurt mixture.
Ingredients:
Gelatin, Water
The process of preparing gelatin is the same as before. Remember to soak it thoroughly in cold water.
14
Transfer the fruit purée to a small saucepan, add sugar, and heat over low heat, stirring, just until the sugar dissolves. The mixture should not boil, it should only be warm. Remove from heat.
Ingredients:
Sugar, Mango pulp, Passion fruit pulp
Heating the puree is necessary to dissolve the sugar and to ensure it is at the right temperature to combine with the gelatin.
15
Dissolve the swollen gelatin in the microwave or in a water bath until it reaches a liquid consistency. Add the dissolved gelatin to the warm (but not hot!) fruit puree and mix very vigorously with a whisk until fully combined. Set the puree aside to cool completely at room temperature. It should have the consistency of slightly thickening jelly.
Ingredients:
Gelatin
It is critically important that the fruit puree is completely cooled before pouring it over the cheesecake. Pouring warm puree will dissolve the top layer of the yogurt mixture and the layers will mix.
Assembly and decoration
16
When the yogurt mixture is well set and the fruit puree is completely cooled and starting to thicken slightly, gently pour it over the cheesecake. Spread it evenly across the entire surface using a spoon or spatula.
Pour the puree slowly and carefully, preferably over the back of a spoon, so that the stream does not create a dent in the yogurt mixture.
17
Place the prepared cheesecake back in the refrigerator for at least 2 hours, preferably overnight. During this time, all the layers will set perfectly and the flavors will meld together.
Patience is key! Longer cooling ensures that the cheesecake will be stable and easy to slice.
18
Before serving, carefully remove the cheesecake from the refrigerator. Run a thin, sharp knife along the inner edge of the springform pan to separate the cake from the mold. Then gently unclip the ring and remove it. Optionally, before serving, you can decorate the top of the cheesecake with toasted coconut flakes and fresh mint leaves.
Ingredients:
Coconut flakes, Fresh mint
To achieve perfectly smooth edges, you can dip the knife in hot water for a moment and wipe it dry before separating the cake from the pan.
Fun Fact
💡
No-bake cheesecakes gained immense popularity in the mid-20th century in the United States with the rise of refrigerators and commercially available gelatin. They were promoted as a quick and easy dessert that doesn't require an oven, which was a lifesaver especially during hot summer months.
Always serve the cheesecake well chilled, straight from the fridge. Use a long, sharp knife for cutting, dipping it in hot water and drying it off before each cut. This will give you perfectly even and clean portions, without ragged edges. Each portion can be additionally decorated with fresh fruits, such as pieces of mango or passion fruit.
🥡Storage
Store the cheesecake in the refrigerator, covered with plastic wrap or in an airtight container, to prevent it from absorbing odors. It will stay fresh for 3-4 days. Due to its high dairy and gelatin content, this dessert is not suitable for freezing, as it will lose its smooth, velvety texture and may separate after thawing.
Homemade cakes and pastries are the heart of Polish culinary tradition - sweet memories from childhood. In our collection, you will find recipes for classic yeast cakes, shortcrust, sponge, and cheesecake. Apple pie, poppy seed cake, gingerbread, Easter babka, chocolate cake, and New York cheesec...
Dishes for special occasions are culinary masterpieces for birthdays, anniversaries, and holidays. Grilled beef steak with herb butter - restaurant quality at home. Beef Wellington - beef in puff pastry with duxelles. Roast duck with apples - a holiday tradition in a new edition. Pink salmon with...


Comments (0)
Be the first to comment on this recipe!
Add a comment