Menu

Buttermilk Honey-Oat Bread from the Pot

Cakes and Bakes Breakfasts Additions 210 min Medium 4 wyświetleń ~7.90 PLN - (0)
Rate:
(0)

Description

Here is a recipe for bread that will change your perception of homemade baked goods. Buttermilk Honey-Oat Bread from the Pot is the essence of simplicity and extraordinary flavor. Thanks to baking in a closed, hot cast iron pot, the bread gains an incredibly crispy, golden crust that beautifully contrasts with the moist, delicate, and slightly springy crumb. The addition of buttermilk makes the interior incredibly soft and gives it a characteristic, subtly tangy taste. Liquid honey introduces a hint of sweetness and helps achieve a deep color on the crust, while oats enrich the texture and add nutritional value. This is a bread made using the 'no-knead' method, making it perfect for beginner bakers. Just mix the ingredients, give them time to rise, and let the magic of the hot pot do the rest. Serve it with butter, homemade jam, or as a base for your favorite sandwiches.

Składniki (10)

Servings:
8
  • Bread flour type 750 400 g
  • Whole wheat flour type 2000 100 g
  • Buttermilk 350 ml
  • Water 50 ml
  • Fresh yeast 20 g
  • Liquid multifloral honey 2 łyżki
  • Instant oats 50 g
  • 🌿 Przyprawy
  • Salt 10 g
  • ✨ Opcjonalne
  • Mountain oats 20 g
  • Sunflower seeds 30 g
💰 Szacowany koszt dania: ~7.90 PLN (0.99 PLN/porcję)

💡 Kliknij na składnik aby oznaczyć jako użyty

Preparation steps

Preparing the starter

1

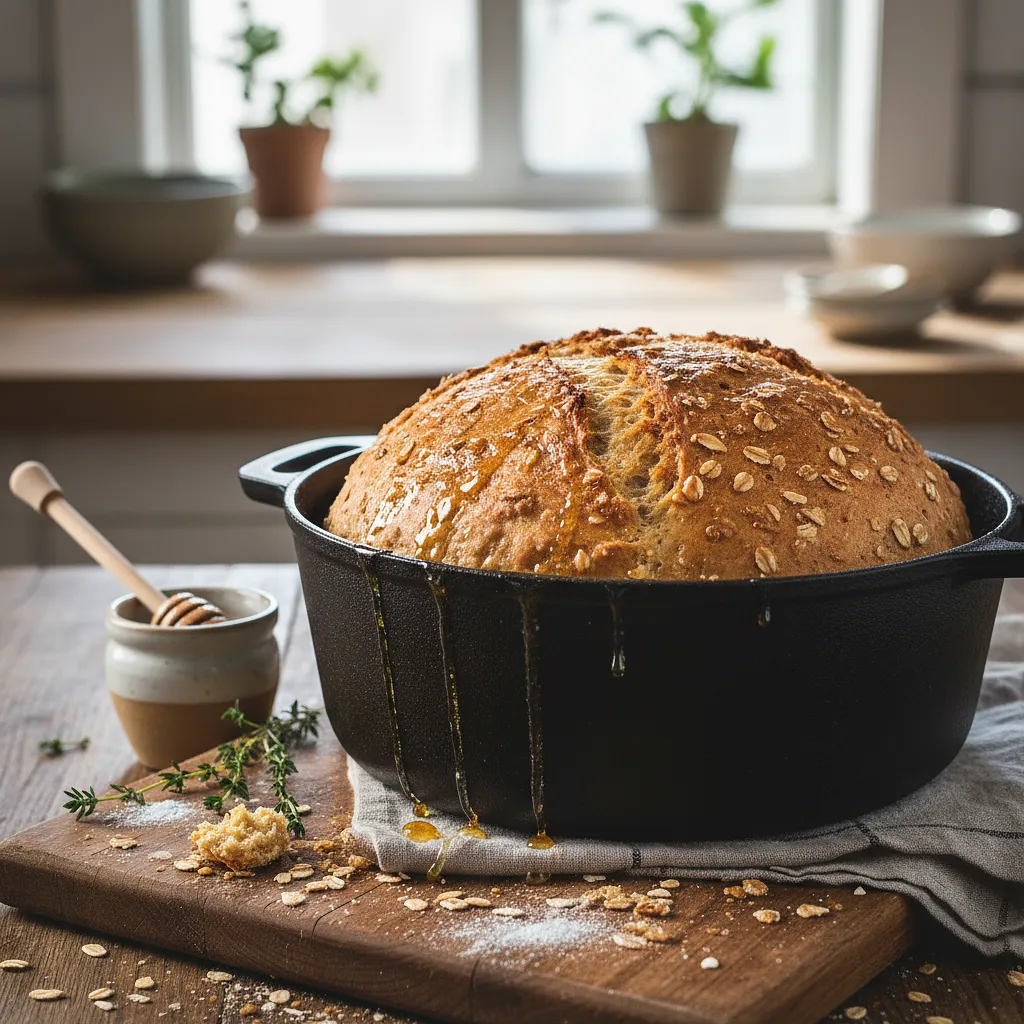
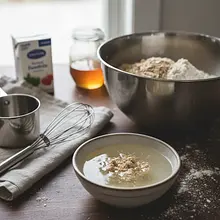
In a small bowl or cup, place the crumbled fresh yeast. Heat the water until it is slightly warm, but not hot (the ideal temperature is 37°C, like body temperature). Pour the warm water over the yeast, add one tablespoon of honey. Gently mix everything with a fork until the yeast and honey dissolve. Set the bowl in a warm place for about 10-15 minutes. After this time, a thick, beige foam, called a 'cap', should appear on the surface. This is a sign that the yeast is active and ready to work.

Ingredients: Fresh yeast, Water, Liquid multifloral honey
If no foam appears on the surface after 15 minutes, it means the yeast is inactive. You should start over using fresh yeast. Water that is too hot (above 45°C) will kill the yeast!

Kneading the dough

2

In a large bowl (it should be big enough for the dough to double in size), add both types of flour: bread flour and whole wheat flour. Add salt and quick oats. If you are using sunflower seeds, add them now. Mix all the dry ingredients thoroughly with a large spoon or a whisk to distribute them evenly.

Ingredients: Bread flour type 750, Whole wheat flour type 2000, Salt, Instant oats, Sunflower seeds
Use a really large bowl, with a capacity of at least 4-5 liters. Thoroughly mixing the dry ingredients is important so that the salt does not come into direct contact with the concentrated yeast, which could weaken their effect.
3

Pour the risen, frothy yeast starter into the bowl with the dry ingredients. Then add the buttermilk (make sure it is at room temperature) and the remaining honey. Using a wooden spoon or silicone spatula, start mixing the ingredients, making movements from the edges of the bowl to the center. Mix only until all the ingredients are combined and no dry flour is visible. The dough will be very loose, sticky, and tacky - this is the correct consistency for this bread.

Ingredients: Buttermilk, Liquid multifloral honey
Do not knead this dough! The 'no-knead' method involves minimal intervention. Mixing for too long is not necessary. Taking the buttermilk out of the fridge 30-60 minutes before use will help the yeast work faster.

First rising

4

Cover the bowl with the dough with a clean kitchen towel or plastic wrap. Set it in a warm, draft-free place for about 1.5 to 2 hours. During this time, the dough should double in size and become very fluffy, full of air bubbles.

The ideal place for rising is an oven with just the light on or slightly ajar after briefly heating to 40°C and turning it off. You can also place the bowl near a radiator.

Shaping and second rising

5

Dust a work surface or countertop generously with flour. Gently transfer the risen dough from the bowl to the surface using a spatula. It will be sticky, so you can also dust your hands with flour. Flatten the dough gently into a rectangle, then fold the sides towards the center like an envelope - first one side, then the other. Turn the dough over and shape it into a smooth, round ball, tucking the edges underneath. Try to do this gently to avoid removing too much air from the dough.

Do not knead the dough. The goal is only to shape it and create surface tension. This will help the bread maintain its shape while baking and rise nicely.
6

On the countertop, lay out a large sheet of parchment paper. Transfer the shaped loaf onto it, seam side down. If you want to decorate the bread, moisten the top with a little water using a brush and sprinkle with rolled oats. Loosely cover with a cloth and let rise for the second time for about 30-40 minutes.

Ingredients: Mountain oats
Parchment paper is essential - it will allow you to safely transfer the risen dough to a very hot pot without burning your hands.

Baking in a pot

7

During the second rise of the dough, place a cast iron pot (or a heatproof dish) with a lid in the oven. Preheat the oven to 230°C (convection or top-bottom). The pot must heat up with the oven for at least 30 minutes to become extremely hot.

Use a cast iron pot with a capacity of 4-5 liters. It is very important that the pot is heated to the maximum. This thermal shock will cause the bread to rise dramatically ('oven spring') and create a crispy crust. Always use thick oven mitts when working with a hot pot!
8

Carefully remove the hot pot from the oven and place it on a heat-resistant surface. Remove the lid. Grab the corners of the parchment paper and gently lower the loaf into the pot. Put the lid back on, place the pot in the oven, and bake for 30 minutes.

Be careful of the hot steam that will escape when you remove the lid. Baking covered creates an environment in the pot similar to a steam oven, which is key for the perfect crust.
9

After 30 minutes, carefully remove the lid from the pot (watch out for the steam!). The bread should have risen nicely and be pale. Reduce the oven temperature to 210°C and continue baking uncovered for another 15-20 minutes, until the crust takes on a deep golden-brown color.

To check if the bread is baked, you can gently tap the bottom. It should make a dull, hollow sound. If you have a kitchen thermometer, the internal temperature of the bread should be 96-98°C.

Cooling

10

Immediately after removing from the oven, carefully take the bread out of the hot pot (you can use parchment paper to help) and transfer it to a metal rack. Leave it to cool completely for at least 1-2 hours before slicing. During cooling, you will hear the characteristic 'singing' of the bread - that’s the crust cracking.

This is the most important and difficult step - resisting the urge to slice the hot bread! Cutting into a warm loaf will cause the crumb to become gummy and dense. The full structure of the bread develops as it cools.

Fun Fact

💡

Baking bread in a pot, known as the 'Dutch oven' method, mimics the conditions found in professional bakery ovens. The closed pot traps the steam released from the dough, maintaining high humidity during the initial baking phase. This delays the formation of the crust, allowing the bread to rise to its fullest. Only after removing the lid does the hot, dry air create a perfectly crispy and cracked crust.

Best for

Tips

🍽️ Serving

This bread is absolutely phenomenal when it's still slightly warm, spread with a thick layer of good quality butter that slowly melts on it. It pairs perfectly with honey, homemade jams (e.g. plum or raspberry), as well as with cottage cheese and chives. In a savory version, it is an ideal base for sandwiches with avocado, salmon, or aged cheese. Sliced into thick pieces, it is great for dipping in thick cream soups or aromatic stews.

🥡 Storage

To maintain the crispness of the crust and the freshness of the crumb, store bread in a linen or cotton bag, or in a traditional bread box. Avoid storing it in a plastic bag, as the crust will quickly become chewy. Bread stays fresh for 3-4 days. It can also be sliced, frozen, and individual portions can be thawed as needed in a toaster.

📸 Ugotowane przez społeczność

Zaloguj się, aby dodać zdjęcie
Dodaj zdjęcie gotowej potrawy

Po zatwierdzeniu przez moderatora otrzymasz 10 punktów doświadczenia.

🍲

Nikt jeszcze nie dodał zdjęcia. Bądź pierwszy!

Comments (0)

Be the first to comment on this recipe!

Add a comment

You might also like

Recipe Categories

Homemade cakes and pastries are the heart of Polish culinary tradition - sweet memories from childhood. In our collection, you will find recipes for classic yeast cakes, shortcrust, sponge, and cheesecake. Apple pie, poppy seed cake, gingerbread, Easter babka, chocolate cake, and New York cheesec...

See all recipes in this category

Breakfast is the most important meal of the day - energy for a good start and a tasty morning. Scrambled eggs, fried eggs, poached eggs, and omelets - protein classics. Oatmeal with fruits, nuts, and honey - a healthy and filling fit breakfast. American pancakes and French crepes - a sweet start ...

See all recipes in this category
Additions
Additions in: New Year's Eve

Side dishes should complement the main courses, introducing variety and color to the New Year's table.

See all recipes in this category
Reklama