Menu

Spartak Cake with a Hint of Orange and Coffee

Cakes and Bakes Desserts Dishes for Special Occasions 180 min Hard 4 wyświetleń ~65.43 PLN - (0)
Rate:
(0)

Description

The Spartak cake is a classic, multi-layered dessert originating from Eastern Europe, valued for its extraordinary texture and depth of flavor. In this unique version, the traditional honey-cocoa layers have been enriched with an intense coffee note, giving them a more sophisticated and deep aroma. They are filled with a velvety cream based on mascarpone cheese and fluffy whipped cream, with a refreshing hint of fresh orange zest that perfectly balances the sweetness of the cake. The whole is topped with a glossy dark chocolate glaze. After chilling, the cake becomes moist and melts in your mouth, with each layer perfectly complementing the others, creating a harmonious whole. It is an incredibly visually impressive dessert, perfect for special occasions, which will surely delight guests with its richness of flavors and elegant appearance.

Składniki (16)

Servings:
12
  • Mąka pszenna tortowa (typ 450) 500 g
  • Butter (min. 82% fat) 150 g
  • Cukier drobny 150 g
  • Liquid honey (e.g. wildflower) 4 łyżki
  • Eggs (size L) 2 szt.
  • Unsweetened dark cocoa 50 g
  • Baking soda 8 g
  • Serek mascarpone 500 g
  • 36% heavy cream 500 ml
  • Powdered sugar 120 g
  • Zest of unwaxed orange 10 g
  • Dark chocolate (min. 70% cocoa) 150 g
  • Milk 3.2% 45 ml
  • 🌿 Przyprawy
  • Instant coffee (granules) 2 łyżeczki
  • Salt 0.0 szczypt
  • ✨ Opcjonalne
  • Candied orange peel 30 g
💰 Szacowany koszt dania: ~65.43 PLN (5.45 PLN/porcję)

💡 Kliknij na składnik aby oznaczyć jako użyty

Preparation steps

Preparation of honey-coffee cake

1

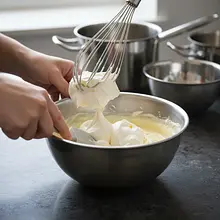
In a heavy-bottomed saucepan, place 100g of butter, sugar, honey, and instant coffee. Heat over low flame, stirring occasionally with a wooden spoon, until all the ingredients dissolve and combine into a smooth, liquid mixture. Be careful not to bring the mixture to a boil.

Ingredients: Butter (min. 82% fat), Cukier drobny, Liquid honey (e.g. wildflower), Instant coffee (granules)
Use a pot with a capacity of about 2 liters so that the mixture has room for later foaming. Stirring prevents the sugar from burning on the bottom.
2

Remove the saucepan from the heat. Add baking soda to the hot mixture and stir vigorously. The mixture will foam up dramatically and increase in volume, and its color will become lighter. This is a normal reaction. Stir for about a minute, then set the mixture aside to cool slightly for about 10-15 minutes. It should be warm, but not hot.

Ingredients: Baking soda
The reaction of baking soda with acidic honey will aerate the dough. Make sure the mixture is not too hot before adding the eggs, otherwise they will curdle and you'll end up with scrambled eggs.
3

To the slightly cooled mixture, add one egg at a time, mixing very vigorously with a whisk each time until fully combined. The mixture should become smooth and uniform.

Ingredients: Eggs (size L)
Use a whisk to quickly and thoroughly mix the eggs. This will help you avoid lumps and ensure a smooth consistency of the batter.
4

In a large bowl, mix the sifted flour, cocoa powder, and a pinch of salt. Make a well in the center and pour in the prepared liquid honey mixture. Using a wooden spoon or spatula, start mixing the ingredients, incorporating the dry ingredients from the sides until they are initially combined.

Ingredients: Mąka pszenna tortowa (typ 450), Unsweetened dark cocoa, Salt
Sifting the flour and cocoa is key to aerating the ingredients and avoiding lumps in the batter. This will make the layers more delicate.
5

When the dough starts to come together, transfer it to a lightly floured surface or countertop. Knead by hand for about 5-7 minutes, until the dough is smooth, elastic, and no longer sticky to your hands. The dough will be warm and very pliable. Shape it into a ball, slightly flatten it, wrap it in plastic wrap, and place it in the refrigerator for at least 30 minutes.

Do not add too much flour while kneading, as the dough will harden after chilling. Chilling the dough is essential for the fat to firm up, which will make rolling it out much easier later on.

Baking the layers

6

Preheat the oven to 180°C (fan or conventional). Take the chilled dough out of the fridge and divide it into 8-10 equal parts. It’s best to use a kitchen scale to ensure each piece has the same weight – this will ensure even layers.

If you don't have a scale, shape the dough into a log and cut it into equal slices with a knife. Keep each piece covered so it doesn't dry out while rolling out the others.
7

Roll out each piece of dough very thinly (to a thickness of about 1-2 mm) directly on a sheet of baking paper. Trace a circle using a plate or the bottom of a springform pan with a diameter of 22-24 cm and cut it out with a knife. Leave the scraps of dough next to the circle on the paper. Prick the dough densely with a fork over the entire surface.

Rolling on parchment paper prevents sticking and makes it easier to transfer the thin dough to the baking tray. Pricking with a fork will prevent air bubbles from forming during baking.
8

Place the tray with the prepared base and scraps in the preheated oven. Bake for about 5-7 minutes. The finished base will be slightly browned at the edges. After removing it from the oven, it will be soft but will harden as it cools. Carefully slide the paper with the base onto a cooling rack. Repeat the process with the remaining parts of the dough.

The layers bake very quickly, so keep an eye on the oven. Gather the baked scraps into a bowl – they will be used later for decorating the cake.

Preparation of the orange cream

9

In the bowl of a mixer, place very well chilled heavy cream. Whip on high speed, starting from medium, until you achieve thick, stiff whipped cream. Be careful not to 'overwhip' it (not to curdle it). The finished whipped cream should form stiff peaks that do not fall.

Ingredients: 36% heavy cream
To ensure the cream whips well, the bowl and mixer attachments should also be chilled. Place them in the refrigerator for 15 minutes before whipping.
10

In a separate, large bowl, place the mascarpone cheese (also straight from the fridge), sifted powdered sugar, and freshly grated orange zest. Mix on low speed with a mixer, just until the ingredients are combined into a smooth, uniform mixture (about 30 seconds).

Ingredients: Serek mascarpone, Powdered sugar, Zest of unwaxed orange
Do not mix the mascarpone for too long, as it may curdle and become runny. The goal is just to combine the ingredients.
11

Add the whipped cream to the mascarpone mixture in three batches. Gently fold in each batch using a silicone spatula, making movements from bottom to top (folding technique). Mix only until the cream is uniform. The finished cream should be thick and fluffy.

Gentle folding, not mixing, is key to maintaining the fluffiness and volume of whipped cream. This will ensure the cream is light and airy.

Assembling the cake

12

On a platter or flat plate, place the first layer of cake. Spread an even layer of cream on it (about 3-4 tablespoons). Cover with the second layer, press down lightly, and spread the same amount of cream again. Repeat this process until all layers and cream are used up, leaving the last, flattest layer on top.

It's worth measuring the same amount of cream for each layer to ensure the cake is even. This can be done by dividing the cream into as many parts as there are layers to fill.
13

Spread the remaining cream thinly on the sides and top of the cake, smoothing the surface with a long spatula or knife. Place the assembled cake in the refrigerator for at least 8 hours, preferably overnight. This is a crucial step during which the firm layers will absorb moisture from the cream, soften, and blend into a cohesive whole.

Do not skip the cooling step! Without it, the cake will be hard and dry. You can wrap the cake in plastic wrap to prevent it from absorbing odors from the fridge.

Preparation of the glaze and decoration

14

Place the previously baked and cooled cake scraps in a sturdy zip-top bag and crush them with a rolling pin into fine crumbs. You can also use a food processor.

The degree of crumb texture depends on preference – they can be as fine as sand or with larger pieces for a more interesting texture.
15

In a small saucepan, place the broken dark chocolate, 50g of butter, and milk. Heat in a water bath (that is, in a bowl set over a pot of gently boiling water), stirring until the ingredients melt and combine into a smooth, glossy glaze. Remove from heat and let it sit for 5-10 minutes to cool slightly. The glaze should still be liquid but not hot.

Ingredients: Dark chocolate (min. 70% cocoa), Butter (min. 82% fat), Milk 3.2%
A water bath provides gentle and even heating, which prevents the chocolate from burning. The bottom of the bowl should not touch the surface of the water.
16

Take the chilled cake out of the refrigerator. Pour the cooled chocolate glaze over the top, allowing it to flow freely down the sides, creating an impressive drip effect. Sprinkle the sides of the cake with the prepared cake crumbs, gently pressing them with your hand or a spatula. Optionally, decorate the top with candied orange peel.

Ingredients: Candied orange peel
To make it easier to coat the sides, place the cake on a rack and put a tray or a large sheet of parchment paper underneath, which will help collect excess crumbs.
17

Place the finished cake back in the refrigerator for at least 30 minutes to allow the glaze to set completely. It is best to cut the cake with a sharp, long knife, dipped for a moment in hot water and dried before each cut.

A hot knife will smoothly glide through the layers of chocolate and cream, allowing you to achieve perfectly even and aesthetically pleasing pieces of cake.

Fun Fact

💡

The name of the cake 'Spartak' is shrouded in mystery. One theory suggests that it comes from the football club Spartak Moscow, and the dark and light layers were meant to symbolize the club colors. Another legend refers to the Roman gladiator Spartacus, with the numerous layers of cake symbolizing strength and perseverance.

Best for

Tips

🍽️ Serving

The cake tastes best when well chilled, taken out of the fridge about 15-20 minutes before serving. It pairs perfectly with a cup of strong espresso or black tea, which will enhance its chocolate-coffee flavor. Use a long, sharp knife dipped in boiling water for cutting.

🥡 Storage

Store the cake in the refrigerator, in an airtight container, to prevent it from absorbing other odors. It stays fresh and retains the best flavor for up to 4 days. Interestingly, on the second and third day after preparation, it tastes even better as the flavors meld together.

📸 Ugotowane przez społeczność

Zaloguj się, aby dodać zdjęcie
Dodaj zdjęcie gotowej potrawy

Po zatwierdzeniu przez moderatora otrzymasz 10 punktów doświadczenia.

🍲

Nikt jeszcze nie dodał zdjęcia. Bądź pierwszy!

Comments (0)

Be the first to comment on this recipe!

Add a comment

You might also like

Recipe Categories

Homemade cakes and pastries are the heart of Polish culinary tradition - sweet memories from childhood. In our collection, you will find recipes for classic yeast cakes, shortcrust, sponge, and cheesecake. Apple pie, poppy seed cake, gingerbread, Easter babka, chocolate cake, and New York cheesec...

See all recipes in this category
Desserts
Desserts in: New Year's Eve

A sweet ending to the New Year's Eve dinner is a must-have that will put everyone in a joyful mood for the new year.

See all recipes in this category

Dishes for special occasions are culinary masterpieces for birthdays, anniversaries, and holidays. Grilled beef steak with herb butter - restaurant quality at home. Beef Wellington - beef in puff pastry with duxelles. Roast duck with apples - a holiday tradition in a new edition. Pink salmon with...

See all recipes in this category
Reklama