Menu

Banana-chocolate brownie with salted caramel and crunchy crumble

Desserts Cakes and Bakes 90 min Medium 10 wyświetleń ~28.21 PLN - (0)
Rate:
(0)

Description

Delicate brownies inspired by the combination of bananas and intense chocolate, complemented by homemade, slightly salty caramel and a crunchy nut-coconut crumble. This dessert has a rich, moist interior thanks to ripe bananas, with a distinct chocolate bitterness and a contrast of salty caramel. It looks elegant—served in pieces with a glossy caramel glaze, decorated with half a nut or coconut flakes. It will be perfect for a sweet blog post (Sweet Blog), with afternoon coffee, as a dessert for a small gathering, or a weekend bake for the family. It combines simplicity of preparation with an impressive appearance and balanced flavor: moist, dense interior, crunchy toppings, and flowing caramel.

Składniki (15)

Servings:
8
  • Wheat flour 120 g
  • Natural cocoa 30 g
  • White sugar 120 g
  • Butter 100 g
  • Bitter chocolate 70% 100 g
  • Egg 2 szt.
  • Ripe banana (peeled) 300 g
  • Baking powder 6 g
  • Vanilla extract 5 g
  • Brown sugar (for caramel) 80 g
  • 30% cream (for caramel) 100 ml
  • Butter (for caramel) 30 g
  • 🌿 Przyprawy
  • Salt 0.1 szczypt
  • ✨ Opcjonalne
  • Walnuts 60 g
  • Coconut flakes 30 g
💰 Szacowany koszt dania: ~28.21 PLN (3.53 PLN/porcję)

💡 Kliknij na składnik aby oznaczyć jako użyty

Preparation steps

Preparation

1

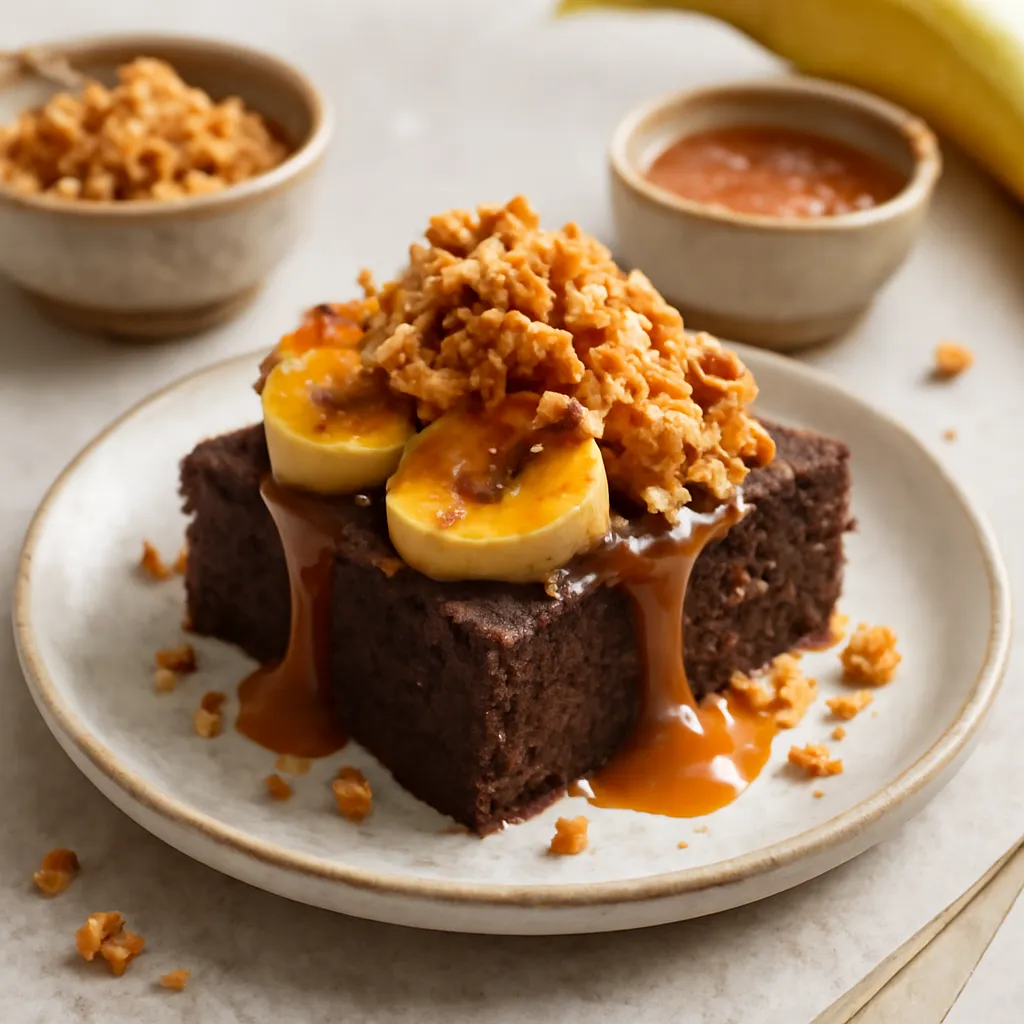
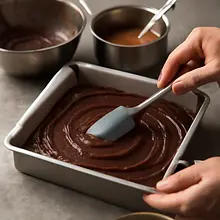
Preheat the oven to 175°C (top-bottom). Prepare a square baking pan measuring about 20×20 cm: line the bottom and sides with parchment paper, leaving 2–3 cm "handles" of paper on the sides to make it easier to remove the cake after baking.

Use a 20×20 cm baking dish or a springform pan of similar size. If you have a convection setting, set it to 160–165°C. Parchment paper makes it easier to remove the brownie.

Caramel

2

Prepare the caramel before baking so it has time to cool down a bit: in a small, heavy-bottomed saucepan, evenly sprinkle the brown sugar on the bottom and set it over medium heat. Do not stir right away — every 30–40 seconds, gently shake the saucepan to help the sugar start melting evenly. When the brown crystals at the edges melt and begin to darken, you can gently stir with a wooden spoon until all the sugar becomes uniform and clear (this will take about 6–8 minutes).

Ingredients: Brown sugar (for caramel)
Use a wide, thick-bottomed saucepan (diameter 16–18 cm) — it distributes heat evenly. Do not hold your hands over the open saucepan and do not add water to the melting sugar (risk of splattering).
3

When the sugar is completely dissolved and golden amber, remove the saucepan from the heat and quickly add the cold butter cut into pieces (30 g). Stir vigorously with a wooden spoon until the butter melts and combines with the sugar. Then, very slowly, in a thin stream and while continuously stirring, pour in the chilled 30% cream (100 ml). Stir until the caramel becomes smooth. If the caramel is bubbling intensely, wait a few seconds and stir carefully — the hot sugar may splatter.

Ingredients: Butter (for caramel), 30% cream (for caramel)
Add the cream slowly to prevent the sugar's temperature from causing a sudden splash. If the caramel is too thin, you can briefly bring it to a boil (1 min), but remember that it will thicken as it cools.
4

Add 1/2 teaspoon (about 2 g) of salt to the caramel, stir, and set the saucepan aside to let the caramel cool to a warm temperature (about 10–15 minutes). The caramel should be pourable but not hot. It will be ready to drizzle over the brownies after baking.

Ingredients: Salt, Brown sugar (for caramel)
Salt will enhance the flavor of the sweet caramel. The caramel is very hot — use a silicone spatula and keep your hands away from the steam.

Cake

5

Prepare the dry ingredients: sift the flour and cocoa together into a large bowl, add the baking powder and half (1 g) of the salt. Whisk to combine until you have a uniform dry mix without lumps.

Ingredients: Wheat flour, Natural cocoa, Baking powder, Salt
A sieve will aerate the flour and remove cocoa lumps. Use a large bowl (at least 2–3 liters) to have enough space for mixing wet and dry ingredients.
6

Make banana puree: peel the bananas and place them in a bowl. Use a fork or potato masher to mash the bananas into a smooth mixture with fine fibers (it should be uniform, without large pieces). If you want, blend with an immersion blender for 10–15 seconds for a very smooth consistency.

Ingredients: Ripe banana (peeled)
Ripe bananas mash easily — the mixture can be prepared in advance and stored in a closed container in the refrigerator for up to 1 day.
7

In another bowl, beat the melted, slightly cooled butter (100 g) with the sugar (120 g) for 1–2 minutes with a wooden spoon or a mixer on low speed, until the mixture is smooth and slightly glossy. Add the chopped chocolate (100 g) to the warm butter — the chocolate should partially melt from the heat of the butter; if not, briefly melt everything in a water bath or microwave in 20-second intervals, stirring each time.

Ingredients: Butter, White sugar, Bitter chocolate 70%
Use a heatproof bowl (glass or metal) to melt the chocolate. Do not overheat the chocolate — it should be smooth and shiny.
8

Add one egg at a time to the butter mixture (if using a mixer: low speed) or pour both in at once and quickly mix until the ingredients are combined. Add the banana puree (300 g) and vanilla extract (5 ml) and mix until smooth — the mixture should be uniform and slightly runny.

Ingredients: Egg, Ripe banana (peeled), Vanilla extract
If you are using a mixer, do not mix too long after adding the flour to avoid over-aerating the dough. Use a wooden spoon or spatula to combine the wet and dry ingredients.
9

Add the dry mixture (flour+cocoa+powder) to the wet mixture in three portions: each time gently fold with a spatula from the bottom up until most of the flour disappears (3–4 turns of the spatula for each portion). The mixture should be thicker than pancake batter but still moist. If you are adding walnuts (60 g), fold them in now.

Ingredients: Wheat flour, Natural cocoa, Baking powder, Walnuts
Do not mix aggressively or for too long — the goal is to maintain a dense, un-aerated structure of the brownie. If you are using nuts, toast them beforehand for 3–4 minutes in a dry pan for better aroma.

Baking

10

Pour the batter into the prepared pan and smooth the surface with a silicone spatula. If you are using coconut flakes (30 g) or additional chocolate chips, sprinkle them on top. Place the pan in the preheated oven and bake for 25–30 minutes. The brownie should have a set, matte crust on top — the center should be slightly moist, and when you insert a toothpick, it should come out with a few moist crumbs (not raw batter).

Ingredients: Coconut flakes, Walnuts
Use the middle rack in the oven. If the oven has hot spots, rotate the pan halfway through the baking time. Baking for too long will dry out the brownies — it's better to take the cake out a few minutes early than too late.

Baking and Finishing

11

Remove the brownie from the oven and let it sit on the counter for 10 minutes to cool slightly. Then carefully lift it out of the pan, holding onto the protruding parchment paper, and place it on a wire rack to cool completely (about 40–60 minutes). Do not pour out the caramel — it should be warm but not hot.

Cooling on a rack allows air to circulate underneath and prevents steaming, which could soften the bottom of the brownies.
12

When the brownie is still slightly warm (not hot), evenly drizzle it with the prepared warm caramel. Use a spoon or a small spatula to spread the caramel in a thin layer. If you want a 'blob' effect, leave a few drops of caramel on top. Sprinkle the surface with a bit of coconut flakes and a few halves of nuts, and finally, gently sprinkle 1 g of fine sea salt for contrast.

Ingredients: Brown sugar (for caramel), 30% cream (for caramel), Butter (for caramel), Coconut flakes, Walnuts, Salt
If the caramel is very hot, wait for it to cool to a warm temperature (10–15 minutes) so that it doesn't melt the entire surface structure of the brownie.

Serving and Slicing

13

For the cleanest pieces, chill the caramel brownie in the fridge for at least 1–2 hours (the caramel will set and be easier to cut). Before slicing, run a large knife that has been carefully warmed (wiped with hot water) along the blade, wiping it between cuts to create smooth slices.

Use a long knife for cutting and wipe it after each cut to prevent the caramel from sticking. Cooling will improve the texture and make portioning easier.

Serving

14

Serve the pieces on small plates, optionally with a scoop of vanilla ice cream or a cup of strong coffee. You can also drizzle each piece with a thin line of caramel and sprinkle with fresh nuts for texture.

Warm brownie with ice cream is a classic combination — however, if you serve it immediately after drizzling with caramel, be careful, as the caramel will be hot.

Fun Fact

💡

Brownies originated in the United States in the late 19th century as a compact chocolate cake for coffee — the combination of banana and chocolate is a classic known for a long time (banana helps replace some of the fat and sugar), and the addition of salted caramel is a modern twist that is taking the dessert blogging style by storm.

Best for

Tips

🍽️ Serving

Serve chilled pieces so that the caramel doesn't run; add a scoop of vanilla ice cream or whipped cream to each piece for contrast. For adults, you can add a splash of coffee liqueur to the caramel before cooling.

🥡 Storage

Store in an airtight container in the refrigerator for up to 4 days (the caramel will maintain its consistency). You can also freeze portions (without ice cream) wrapped in aluminum foil for up to 2 months; thaw in the refrigerator overnight. Heat in the microwave for 8–12 seconds to restore softness, but be careful not to overheat the caramel.

📸 Ugotowane przez społeczność

Zaloguj się, aby dodać zdjęcie
Dodaj zdjęcie gotowej potrawy

Po zatwierdzeniu przez moderatora otrzymasz 10 punktów doświadczenia.

🍲

Nikt jeszcze nie dodał zdjęcia. Bądź pierwszy!

Comments (0)

Be the first to comment on this recipe!

Add a comment

You might also like

Recipe Categories

Desserts
Desserts in: Christmas Eve Dinner

Desserts are a sweet ending to a meal that brings joy to both children and adults. In this category, we present recipes for a variety of sweets - from simple creams and mousses, to elegant panna cottas, and exquisite fruit tarts. Our desserts include both classics of Polish cuisine - fruit jelly,...

See all recipes in this category

Homemade cakes and pastries are the heart of Polish culinary tradition - sweet memories from childhood. In our collection, you will find recipes for classic yeast cakes, shortcrust, sponge, and cheesecake. Apple pie, poppy seed cake, gingerbread, Easter babka, chocolate cake, and New York cheesec...

See all recipes in this category
Reklama