Menu

Chocolate Cemetery with Meringue Ghosts

Desery Desserts Cakes and Bakes 240 min Medium 13 wyświetleń ~48.30 PLN - (0)
Rate:
(0)

Description

This is not an ordinary cake – it's an edible tale of horror, perfect for Halloween! Chocolate Cemetery is a spectacular dessert that will delight both children and adults. Its base is an intensely chocolatey, moist, and gooey brownie, symbolizing the cemetery ground. The surface is covered with a velvety, muddy ganache made from dark chocolate, sprinkled with crushed cookies that mimic freshly dug earth. From this chocolate scene emerge adorable, crunchy ghosts made from homemade Swiss meringue, while rectangular buttery cookies serve as tombstones. This dessert combines various textures: the softness of the cake, the smoothness of the cream, and the crunchiness of the meringue, creating unforgettable taste experiences. Perfect as the centerpiece of a sweet table at any Halloween party.

Składniki (15)

Servings:
8
  • Bitter chocolate 70% 200 g
  • Masło 82% 180 g
  • Brown sugar 250 g
  • Eggs 4 szt.
  • Wheat flour type 450 100 g
  • Cocoa 30 g
  • Egg whites 3 szt.
  • Drobny cukier do wypieków 180 g
  • Lemon juice 5 ml
  • 30% cream 150 ml
  • Bitter chocolate 50-60% 150 g
  • Butter cookies 120 g
  • 🌿 Przyprawy
  • Salt 0.0 szczypt
  • ✨ Opcjonalne
  • Oreo cookies 50 g
  • Black food coloring 1 g
💰 Szacowany koszt dania: ~48.30 PLN (6.04 PLN/porcję)

💡 Kliknij na składnik aby oznaczyć jako użyty

Preparation steps

Brownie Cake (Cement Ground)

1

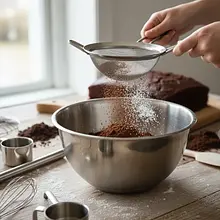
Start by preparing the baking pan and preheating the oven. Set the oven to 170°C with the top and bottom heating function. Prepare a rectangular pan measuring about 20x30 cm. Line it with baking paper so that the paper extends beyond the edges of the pan – this will make it easier to remove the finished cake later.

It's best to use a metal pan that distributes heat evenly. Make sure the oven has reached the required temperature before placing the cake inside; this is key to achieving the perfect texture.
2

Prepare a water bath to melt the chocolate. Pour water into a small pot to a height of about 2-3 cm and bring to a boil. Reduce the heat to the minimum. Place a metal or glass bowl on top of the pot, which should be larger than the diameter of the pot and not touch the surface of the water. In the bowl, add the broken dark chocolate (70%) and diced butter. Slowly stir with a silicone spatula until the ingredients are completely melted and combined into a smooth, shiny mixture. Remove the bowl from the pot and set aside to cool slightly for about 5-10 minutes.

Ingredients: Bitter chocolate 70%, Masło 82%
A water bath is a gentle melting method that prevents chocolate from burning. Be careful not to let a single drop of water get into the bowl with the chocolate, as it can cause it to seize.
3

In a large bowl, place the eggs and brown sugar. Using a hand mixer or a whisk, beat the ingredients for about 3-4 minutes on medium speed. The mixture should become lighter, fluffy, and double in volume. The goal is to aerate the eggs, not to whip them into stiff peaks.

Ingredients: Eggs, Brown sugar
Use eggs at room temperature – they will whip easier and faster. You don't need to use a stand mixer; a regular whisk is enough to achieve the desired effect.
4

Slowly pour the slightly cooled chocolate mixture into the fluffy egg mixture in a thin stream. At the same time, gently mix everything with a spatula or a mixer on the lowest speed, just until the ingredients are combined. Stir with a scooping motion from the bottom to the top to avoid losing the airiness from the eggs.

The chocolate batter must be cooled (warm, but not hot) so that the eggs do not curdle. Mix briefly and gently – overmixing will make the brownies tough.
5

In a separate, smaller bowl, mix the dry ingredients: all-purpose flour, cocoa powder, and a pinch of salt. Sift them directly into the chocolate mixture. Using a spatula, very gently fold everything together, making only a few movements, until the dry ingredients disappear into the mixture. There may be small lumps of flour in the batter – that's okay.

Ingredients: Wheat flour type 450, Cocoa, Salt
Sifting the flour and cocoa is key to avoiding lumps and achieving a light texture. The biggest mistake when making brownies is mixing too long after adding the flour. This develops gluten, and the batter becomes dense instead of chewy.
6

Pour the prepared mixture into the prepared pan and smooth the surface with a spatula. Place in the preheated oven and bake for 25-30 minutes. The brownie is ready when its edges are set and slightly pulling away from the pan, while the center is still slightly moist and 'jiggly'. Check with a toothpick – when inserted into the center, it should be coated with moist crumbs, but not raw batter. After baking, remove from the oven and let it cool completely in the pan.

Don't bake the brownies too long! It's better for them to be slightly underbaked than overbaked. While cooling, the cake will set and achieve the perfect, gooey consistency. Allowing them to cool completely is important before adding the ganache.

Meringue Ghosts

7

While the brownie is baking and cooling, prepare the meringues. Preheat the oven to 100°C (convection or top-bottom heat). Line two large baking sheets with parchment paper. In a perfectly clean, dry metal or glass bowl, place the egg whites. Make sure there is not a trace of yolk in them. Add the lemon juice.

Ingredients: Egg whites, Lemon juice
It is crucial that the bowl and the mixer attachments are perfectly clean and degreased - even a drop of fat or yolk will prevent the egg whites from whipping. It is best to wipe them with vinegar or lemon juice and dry them with a paper towel before use.
8

Start beating the egg whites with a mixer on medium speed. When they start to foam and turn white, but are still liquid (after about 2-3 minutes), begin to add the sugar, one tablespoon at a time, at intervals of about 30 seconds. Do not add all the sugar at once! After adding all the sugar, increase the mixer speed to maximum and beat for another 7-10 minutes, until the meringue becomes very thick, stiff, and shiny. Properly whipped meringue, when rubbed between your fingers, should not have any detectable sugar crystals, and when the bowl is turned upside down, the meringue should not fall out.

Ingredients: Drobny cukier do wypieków
Patience when adding sugar is key for a stable meringue. Adding sugar too quickly can cause the foam to 'deflate' and not whip properly.
9

Transfer the meringue mixture to a piping bag fitted with a round, smooth tip (nozzle) about 1-1.5 cm in diameter. On the prepared baking sheets, pipe the meringues, forming ghost shapes. Do this by first piping a round base, then pulling the bag upwards to create a conical shape with a curled tip. Keep space between the meringues. Place the sheets in the preheated oven and dry the meringues for about 90 minutes. After this time, turn off the oven, slightly crack the door, and leave the meringues inside to cool completely (preferably for a few hours or overnight).

If you don't have a piping bag, you can use a strong ziplock bag with the corner cut off. Do not open the oven while drying, as a sudden change in temperature may cause the meringue to crack.

Chocolate Ganache (Mud)

10

Once the brownie has completely cooled, prepare the ganache. Chop the chocolate (50-60%) into very small pieces and place it in a bowl. In a small saucepan, heat the 30% cream until it is very hot, but do not bring it to a boil (small bubbles should appear at the edges). Pour the hot cream over the chopped chocolate. Wait 2-3 minutes without stirring, so the chocolate can soften.

Ingredients: 30% cream, Bitter chocolate 50-60%
Finely chopping the chocolate is important for it to melt evenly from the heat of the cream. If you start mixing right away, you may cool the cream too quickly, and the chocolate won't melt completely.
11

After 2-3 minutes, start gently stirring the mixture with a small whisk or spatula, beginning from the center of the bowl and making small circular motions. Gradually expand the movements outward until all the chocolate has melted and a smooth, uniform, and glossy cream is formed. Set the ganache aside to thicken slightly for about 15-20 minutes at room temperature. It should have the consistency of thick pudding.

If there are lumps of undissolved chocolate in the ganache, you can briefly heat it (5-10 seconds) in the microwave or over a water bath and mix again.

Assembly of the Cemetery

12

Remove the cooled brownie from the pan by grabbing the protruding parchment paper, and place it on a large plate or board. Spread the prepared and slightly thickened ganache evenly over the entire surface of the cake, creating an uneven, 'muddy' layer.

Use a small spatula or the back of a spoon to create naturally looking dips and mounds on the surface of the ganache.
13

If using, place the Oreo cookies in a ziplock bag and crush them with a rolling pin or a pestle to create 'dirt'. Sprinkle the crushed cookies over the ganache in some places. Then gently insert rectangular butter cookies into the cake at various angles to make them look like tombstones.

Ingredients: Butter cookies, Oreo cookies
Do not crumble the Oreo cookies into dust – leave larger pieces that will mimic clumps of dirt and stones. Insert the tombstones while the ganache is still soft.
14

Finally, decorate the cemetery with ghosts. Using a toothpick and black food coloring (or melted chocolate), paint small eyes on the cooled meringues. Gently place the finished ghosts on the surface of the cake, between the gravestones. The cake is ready to serve!

Ingredients: Black food coloring
Be very gentle when placing the meringues, they are fragile. You can lightly 'stick' them to the surface with a drop of the remaining ganache if you're worried they will move.

Fun Fact

💡

The meringue, from which we make ghosts, was supposedly invented in the Swiss town of Meiringen, hence its name (meringue). However, the French and Italians also claim rights to this invention. Regardless of its origin, these light, crispy cookies are perfect for creating spooky decorations!

Best for

Tips

🍽️ Serving

Serve the cake whole on a large rectangular platter or board so guests can admire the entire cemetery composition. It's best to cut it into square portions with a sharp, hot knife (dipped in boiling water and wiped) right at the table. For an extra effect, you can serve a portion with a scoop of vanilla ice cream or a dollop of whipped cream.

🥡 Storage

The cake tastes best on the day it is made, as the meringues are the crispiest then. It can be stored at room temperature for up to 12 hours. In the refrigerator, it will last for up to 2 days, but the meringues may soften due to moisture. Cover the cake very loosely with aluminum foil, creating a 'tent' to avoid crushing the decorations.

📸 Ugotowane przez społeczność

Zaloguj się, aby dodać zdjęcie
Dodaj zdjęcie gotowej potrawy

Po zatwierdzeniu przez moderatora otrzymasz 10 punktów doświadczenia.

🍲

Nikt jeszcze nie dodał zdjęcia. Bądź pierwszy!

Comments (0)

Be the first to comment on this recipe!

Add a comment

You might also like

Recipe Categories

Desery
Desery in: Sylwester

Słodkie zakończenie sylwestrowej kolacji to must-have, które wprowadzi wszystkich w radosny nastrój na nowy rok.

See all recipes in this category
Desserts
Desserts in: Christmas Eve Dinner

Desserts are a sweet ending to a meal that brings joy to both children and adults. In this category, we present recipes for a variety of sweets - from simple creams and mousses, to elegant panna cottas, and exquisite fruit tarts. Our desserts include both classics of Polish cuisine - fruit jelly,...

See all recipes in this category

Homemade cakes and pastries are the heart of Polish culinary tradition - sweet memories from childhood. In our collection, you will find recipes for classic yeast cakes, shortcrust, sponge, and cheesecake. Apple pie, poppy seed cake, gingerbread, Easter babka, chocolate cake, and New York cheesec...

See all recipes in this category

Dishes for special occasions are culinary masterpieces for birthdays, anniversaries, and holidays. Grilled beef steak with herb butter - restaurant quality at home. Beef Wellington - beef in puff pastry with duxelles. Roast duck with apples - a holiday tradition in a new edition. Pink salmon with...

See all recipes in this category
Desserts for Kids
Desserts for Kids in: For Kids

Desserts for kids are sweet treats without guilt - less sugar, more flavor. Banana ice cream without sugar - frozen bananas blended to a creamy consistency. Chocolate mousse with avocado - creamy and healthy. Vanilla pudding with fruit - a childhood classic. Carrot and apple muffins - hidden vege...

See all recipes in this category

Sylwester to wyjątkowy czas, kiedy żegnamy stary rok i witamy nowy z wielką radością i nadzieją. To niezwykła okazja, która łączy bliskich przy wspólnym stole, gdzie nie może zabraknąć pysznych potraw i napojów. Tradycyjnie celebrujemy ten wieczór różnorodnymi daniami, które symbolizują dostatek ...

See all recipes in this category
Reklama