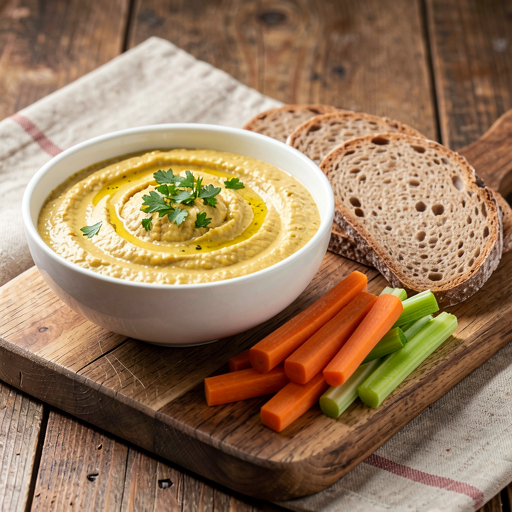
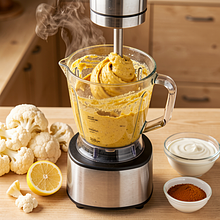
Wash the cauliflower under running, cool water. Place it on a cutting board and cut off the leaves and the thick, hard stem. Using a knife, divide the head into smaller florets about the size of a bite (approx. 2–3 cm). Dry the florets with a paper towel — wet cauliflower will splatter while frying.
Description
Creamy dip made from roasted and sautéed cauliflower with a hint of curry — a unique, vegetarian snack perfect for fresh vegetables, whole grain bread, or as a side for grilled vegetables. The combination of delicate cauliflower with natural yogurt and spices creates a smooth, slightly spicy paste with a golden color. Easy to prepare, aromatic, and seasonal — it’s great for coffee gatherings, spring picnics, and as a healthy alternative to popular mayonnaise dips. It can be served warm or chilled, garnished with fresh parsley and a drizzle of rapeseed oil for shine.
Ingredients Used
Ingredients (11)
- Cauliflower 400 g
- Natural yogurt 200 g
- Garlic 2 ząbki (~10 g)
- Rapeseed oil 15 g
- Lemon 0.6 szt. (~50 g)
- 🌿 Przyprawy
- Curry 4 g
- Salt 0.1 szczypt (~3 g)
- Black pepper 2 szczypty (~1 g)
- ✨ Opcjonalne
- 18% cream 30 ml
- Parsley 15 g
- Honey 15 ml
💡 Kliknij na składnik aby oznaczyć jako użyty
Preparation steps
Preparation
Frying cauliflower
Heat a 26–28 cm skillet over medium-high heat. Pour in the rapeseed oil and wait 30–60 seconds until it gently heats up (without smoking). Add the cauliflower florets in a single layer — if they don't fit, fry in batches. Sprinkle with a thin layer of curry (use half the amount given) and 1 pinch of salt. Fry for 8–10 minutes, stirring every 2 minutes with a wooden spoon, until the cauliflower develops golden-brown spots and is tender when pierced with a fork.
Sautéing garlic
In the last 2 minutes of frying, add the crushed garlic cloves (garlic lightly smashed with a knife). Sauté briefly until the garlic releases its aroma and lightly browns — be careful not to burn it, as it will become bitter. After removing from heat, set the pan aside for a moment to let the cauliflower cool slightly (about 2–3 minutes).
Mixing and combining
Transfer the sautéed cauliflower to a blender or a tall container for an immersion blender. Add natural yogurt, lemon juice (squeezed from about 50 g of lemon), the remaining portion of curry, pepper, and the remaining salt. Blend in pulses for 30–60 seconds, then blend until smooth for 60–90 seconds, until the dip reaches the desired consistency — smooth and creamy or slightly grainy, if you prefer that texture. If the mixture is too thick, add 1 tablespoon of water or more yogurt.
Seasoning
Taste the dip. If it is too sour, optionally add 1 tablespoon of honey and gently mix. For a smoother, richer texture, you can optionally stir in 18% cream (30 g). Finally, season with salt and pepper to taste — remember that the spices intensify after a short resting period.
Serving and decoration
Transfer the dip to a shallow bowl or a small platter. Drizzle the top with 1 teaspoon of canola oil for shine, sprinkle with finely chopped parsley (optional) and a bit of ground pepper or extra curry for color. Serve with carrot sticks, celery, cucumber, whole grain bread, or crunchy crackers.
Fun Fact
Cauliflower is a variety of vegetable cabbage originating from the Mediterranean region; curry spice added to vegetables gained popularity in Europe thanks to the spice trade and combines the classic taste of the vegetable with an exotic aroma.
Best for
Tips
Serve the dip slightly warm or chilled; it pairs wonderfully with raw vegetables (carrots, celery, bell peppers), sourdough bread, or as a spread for sandwiches. For a spicier version, add a pinch of chili powder or sriracha.
Store in an airtight container in the refrigerator for up to 3 days. Before serving, mix and season again, as the flavors may mellow. Do not freeze — the texture of the yogurt and cream will separate upon thawing.
📸 Ugotowane przez społeczność
Zaloguj się, aby dodać zdjęcieDodaj zdjęcie gotowej potrawy
Po zatwierdzeniu przez moderatora otrzymasz 10 punktów doświadczenia.
Nikt jeszcze nie dodał zdjęcia. Bądź pierwszy!
Comments (0)
Be the first to comment on this recipe!
Add a comment