Take the butter and egg out of the fridge about 20-30 minutes before starting, so they reach room temperature — the butter should be cool but soft when pressed with a finger. Weigh all the ingredients and prepare a baking tray lined with parchment paper. Chop the chocolate into irregular pieces about 1-2 cm.
Description
Delicate, buttery shortbread cookies with pieces of dark chocolate — a classic dessert perfect for a May picnic basket. The cookies combine a simple yet rich flavor of butter and vanilla with intense chocolate, being crispy on the edges and slightly crumbly in the middle. Serve with coffee, tea, or milk; they make a great snack outdoors. The recipe includes step-by-step instructions for preparing the dough, chilling, shaping, and baking — so that even beginners can achieve excellent results.
Ingredients Used
Ingredients (10)
- Wheat flour 300 g
- Butter 150 g
- Powdered sugar 100 g
- Chicken egg 1 pcs (~60 g)
- Dark chocolate 150 g
- Baking powder 5 g
- Vanilla sugar 8 g
- 🌿 Spices
- Salt 2 g
- ✨ Optional
- Walnuts 50 g
- Lemon zest 6 g
💡 Click an ingredient to mark it as used
Preparation steps
Preparation of ingredients
Mixing butter and sugar
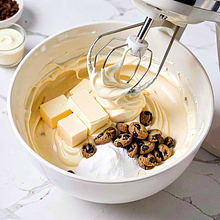
In a large bowl, place the diced butter, powdered sugar, and vanilla sugar. Use a hand mixer or a stand mixer with whisk attachments and beat the ingredients into a light, fluffy mixture for 2-3 minutes on medium speed. The mixture should be creamy, and the sugar well dissolved.
Adding the egg
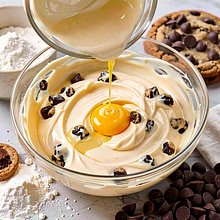
Add the whole egg to the butter mixture and mix briefly (30-45 seconds) just until the ingredients are combined — the mixture should be uniform. If the mixture curdles (releases liquid), mix briefly on low speed until it comes together.
Combining dry ingredients
In a separate bowl, sift the flour with the baking powder and salt. Sifting will aerate the flour and remove lumps, making it easier to achieve a crumbly texture.
Kneading the dough
Add the dry ingredients to the butter mixture in two batches. First, add about 1/3 of the flour and mix with a spoon, then add the rest and quickly knead by hand or with a hook mixer on low speed just until the ingredients are combined. The dough should be firm, not sticky, and slightly soft.
Adding chocolate and toppings
To the kneaded mixture, add the chopped chocolate and, if using, the chopped walnuts and lemon zest. Mix by hand evenly, so that the chocolate pieces are distributed throughout the dough.
Cooling the dough
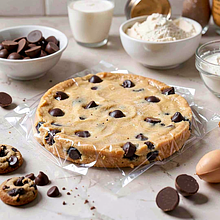
Shape the dough into a disk about 3 cm thick or wrap it in plastic wrap and chill in the refrigerator for at least 30 minutes. Chilling will make it easier to cut/form the cookies and prevent them from spreading during baking.
Shaping the cookies
Take the dough out of the fridge. Roll it out gently to a thickness of 6-8 mm on a lightly floured surface or form balls the size of walnuts and flatten them with your hands. Place the cookies on a baking sheet lined with parchment paper, leaving about 4 cm between them, as they will rise slightly and spread out.
Baking
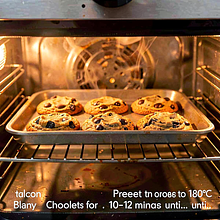
Preheat the oven to 180°C (top-bottom). Place the baking tray on the middle shelf and bake for 10-12 minutes, until the edges of the cookies turn golden brown and the center remains light. The cookies will be soft right after taking them out — they will harden as they cool.
Cooling and Serving
After baking, let the tray sit for 5 minutes so the cookies can firm up slightly, then transfer the cookies to a rack to cool completely. Serve slightly warm or at room temperature.
Fun Fact
Shortbread-style cookies have roots in European kitchens, but the addition of chocolate chips is a 20th-century modernization that became popular due to its ease of preparation and contrast of flavors.
Best for
Tips
Serve with a cup of strong coffee, fruit tea, or cold milk. For a picnic, pack the cookies in a container lined with parchment paper to keep them crisp. You can add a bit of chocolate dessert sauce as a dip.
Store in an airtight container at room temperature for up to 5 days. To refresh the crispness, heat the cookies for 3-4 minutes in the oven at 150°C. You can also freeze raw dough balls for up to 3 months — bake directly from frozen, adding 1-2 minutes to the baking time.
📸 Cooked by the community
Log in to add a photoAdd a photo of the finished dish
After moderator approval, you will receive 10 experience points.
No one has added a photo yet. Be the first!
Comments (0)
Be the first to comment on this recipe!
Add a comment